Hello my Friends!

Last week I found this new Chalkboard at one of my favorite Thrift shops.
It was $2.50- I had to get it.
In my mind it's already done half the work for me!
You can make the sign your choice, tall or wide.
I didn't even have to paint it and it is already framed.
Nice size too- 17''x 23''
Even the back side was in good condition.
I decided to make a Christmas sign with a couple
of stencils I had received as a gift.
I thought I could show you how I used more than one color
on the sign.
I use a thin plastic cutting board and Painters Tape to block parts of the stencil
I don't want to paint.
Painters Tape is not very sticky and it
will not damage
your stencil.
Some stencils are very delicate.

These are the colors I will be using,
First I decided to stain the frame.
I taped off the front and the back.
The chalkboard was made with natural wood.
I used Walnut BRIWAX and a soft cloth and gloves.
I use an old toothbrush to get in the corners !

Just a reminder !
You can flip stencils over if you like objects facing the opposite direction.
First I planned the placement of the truck.
I used the plastic sheet and painters tape to
block out everything near the truck bed panels.
I painted the the panels brown.
Make sure the paint is dry before covering
with what you are using to block
the next layer.
I used my sheet of plastic along with tape to
cover and block the panel area that was already painted.
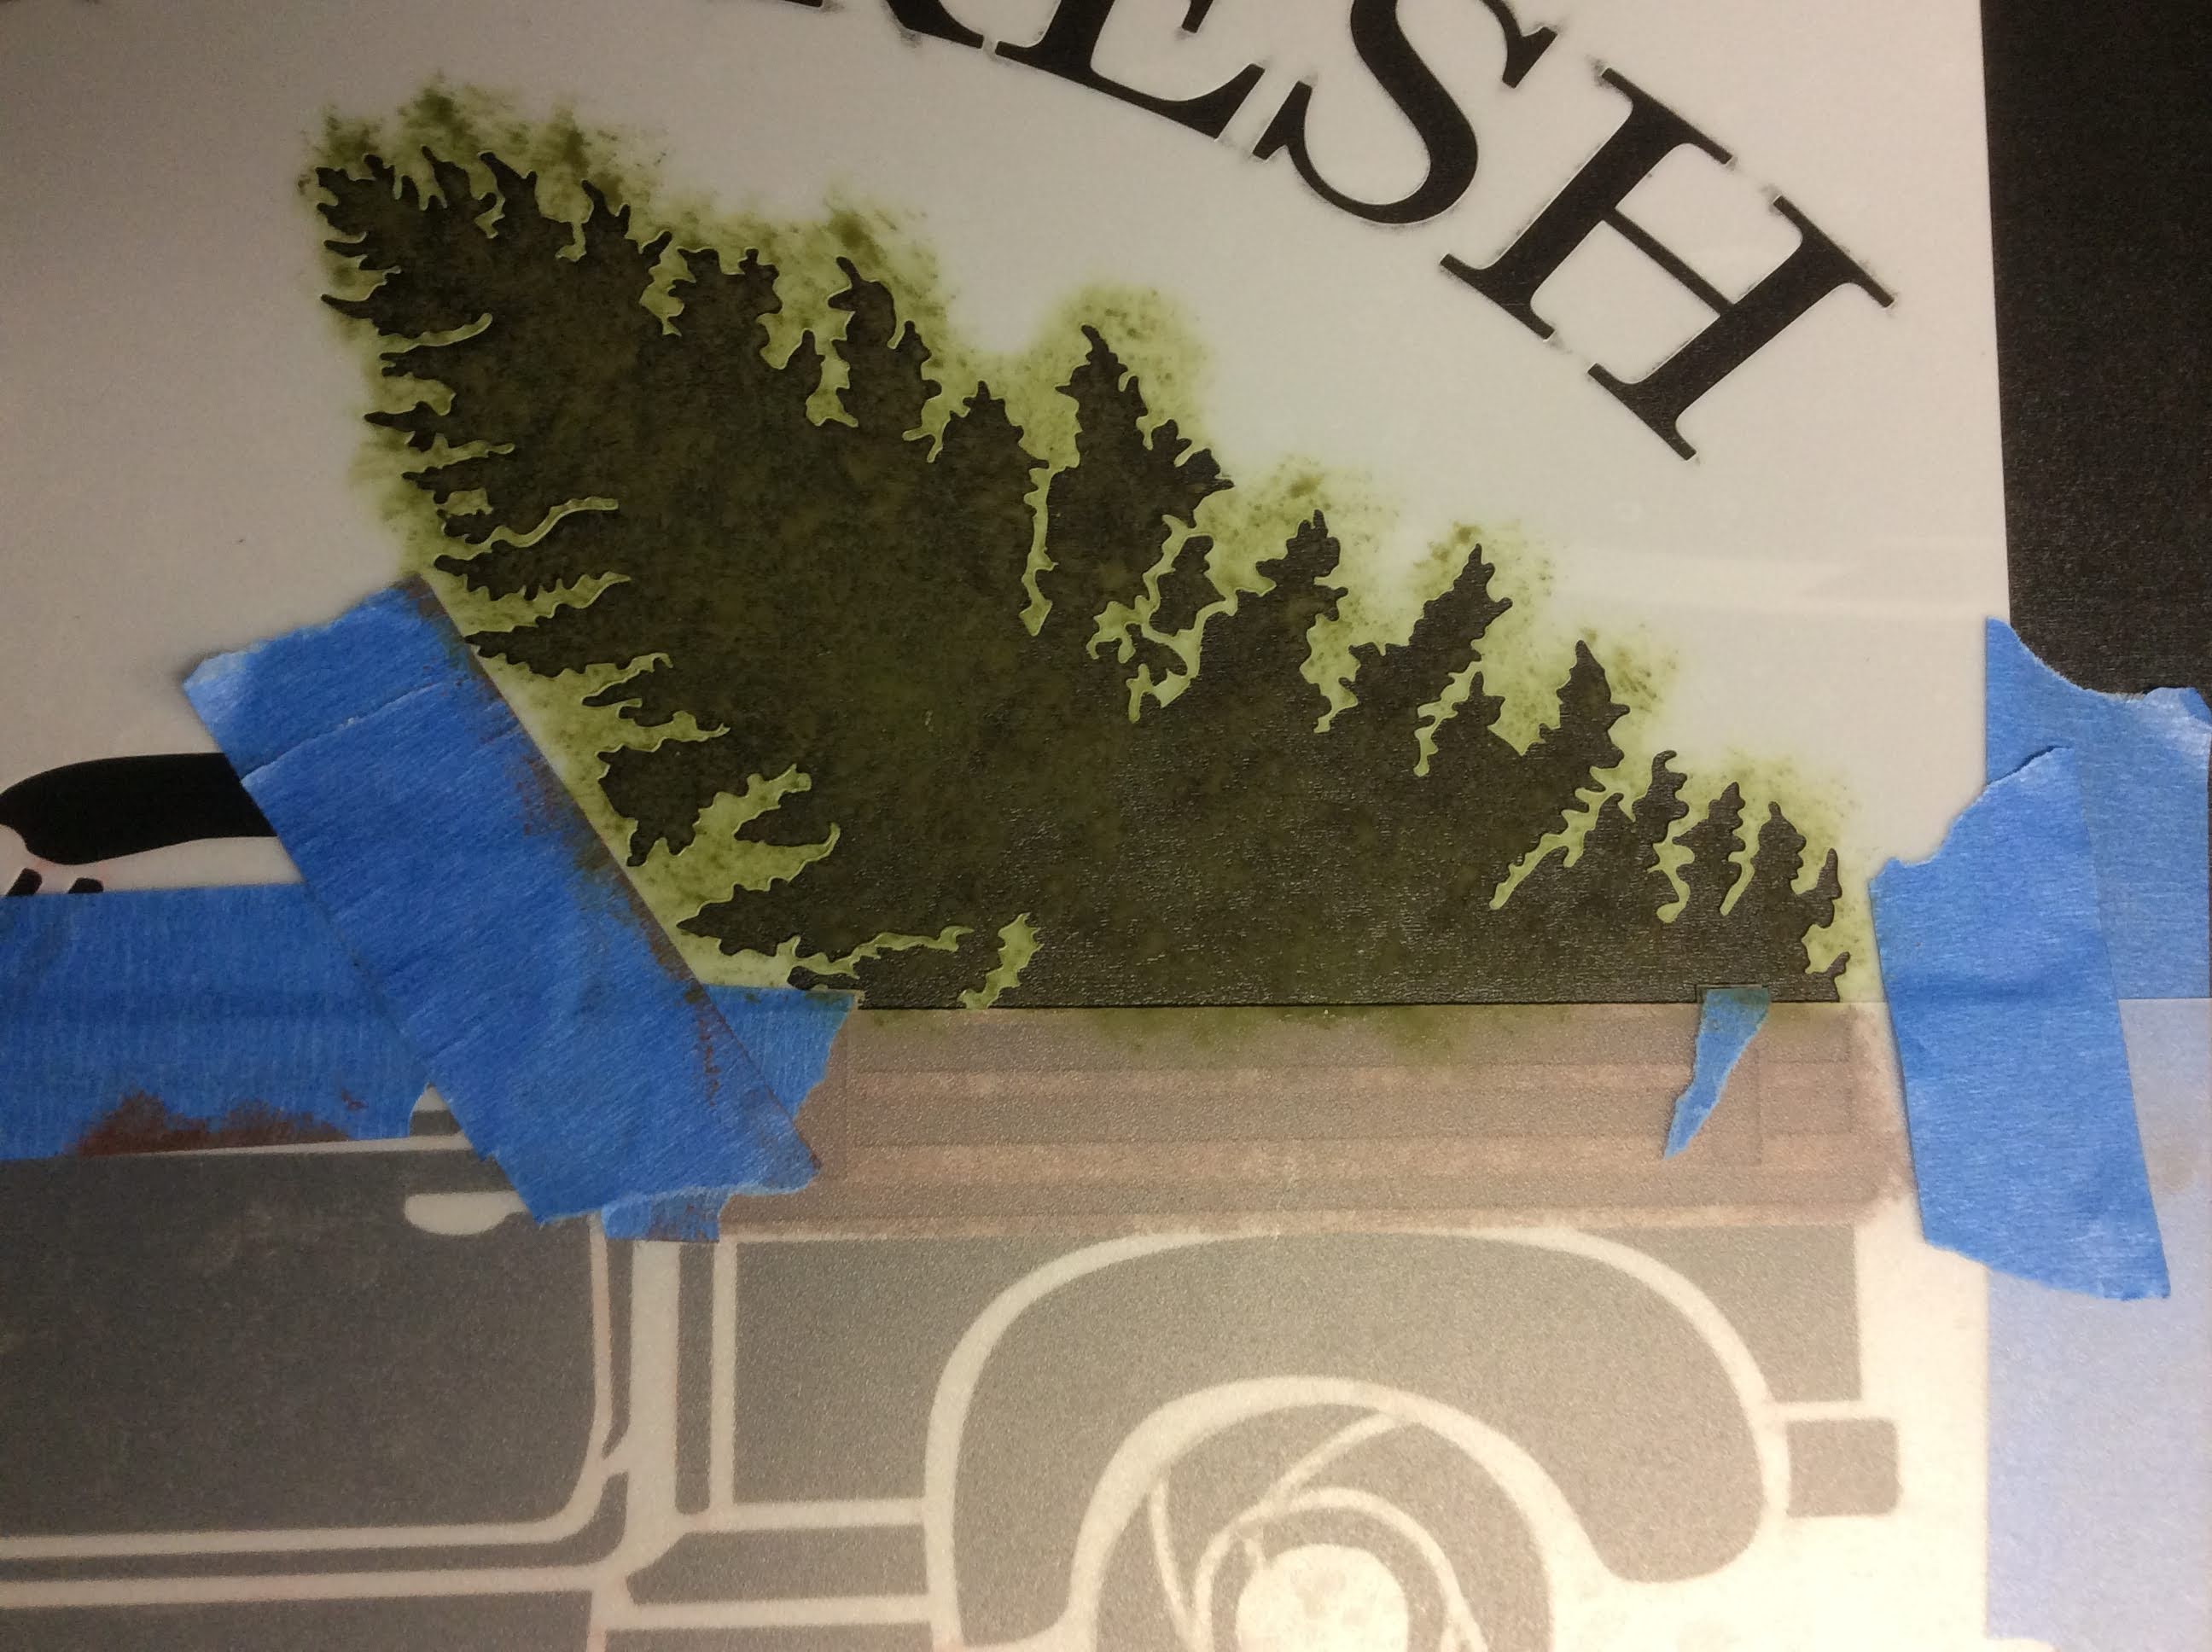
I painted the tree green.
I left open space for the black board to show through.
It gave the tree more dimension.
After the tree was dry
I painted the truck red, and the tires white.
I moved the stencil up on the board
and taped it in place.
I stenciled the lettering in white.
After the FARM FRESH dried, I taped down the other stencil
with CUT AND CARRY.
While that dries, I did the lettering on the bottom of the sign.
If you like an overall chalkboard look,
lay a piece of chalk on its side and
gently cover the entire chalkboard.
Wipe with a soft dry cloth.
I left room at the top to personalize with family name.
You could use regular chalk or chalk paint pen.
Here are the two stencils that I combined tp make
this sign.
Here's a close up !
I am so excited for Thanksgiving, but
just needed to start early on some Christmas decorations.
Tell me if you are excited for Christmas !
xo Lisa S


Great tutorial.
ReplyDeleteJanet,
DeleteThank you so much!
xo Lisa S
También te quedó genial, genial, genial éste proyecto!! Amo el camion rojo para cualquier temporada y más para Navidad.
ReplyDeleteThank you Camila!
Deletexo Lisa S
love the tutorial and where ever did you get that stencil
ReplyDeleteThank you so much!
DeleteThe stencil was a gift, it came to me through Amazon with no
product number or company name. It was a set of 8 different 12x12 stencils. I looked for you but there are hundreds of truck stencils.
xo Lisa S
This was such a great find and you did a wonderful job on creating the sign. I struggle with stencils so your tutorial is a lot of help. Thanks for linking up this week. #HomeMattersParty
ReplyDeleteDonna,
DeleteIt would be great to hang out together and stencil!
xo Lisa S
Such a great project and detailed tutorial. Pinned!
ReplyDeleteThank you Debbee!
DeleteI really appreciate the pin!
So glad you stopped by-
xo Lisa S
Great tutorial, Lisa! Thank you for sharing at Party In Your PJ's - you are being featured on my blog Tuesday evening.
ReplyDeleteAnn,
Deleteoh wow! Thank you so much. You are so kind!!!!
xo Lisa S
That's lovely Lisa and thanks for the great tips. This will be a feature at Handmade Monday later today :-)
ReplyDeleteJulie,
DeleteI appreciate your kind words! YOU are awesome!
Thank you so much for featuring my sign. I am on the hunt for
more chalkboards-
xo Lisa S
That turned out great! Pinned.
ReplyDeleteThank you my friend!
DeleteI love pins-
xo Lisa S
Nice tutorial! I use those thin cutting boards for lots of things. Hadn't thought of using them as a painting mask. Great idea!
ReplyDeleteLydia,
DeleteThank you so much! Those boards are pretty handy.
xo Lisa S
I am DEFINITELY excited for Christmas, and I love your stencil tutorial, Lisa! So happy to feature you at Tuesday Turn About this week!
ReplyDeleteJulie,
DeleteWe have the music blasting!!!
Thank you so much for the feature.
You are the sweetest!
xo Lisa S
I love this!! I've done my share of stenciling over the years, but I don't think I've ever stenciled anything on a blackboard. What a good idea! And your directions about how to use more than one color are very good.
ReplyDeleteThanks so much for joining the Grace at Home party at Imparting Grace. I'm featuring you this week!
Richella,
DeleteThank you so much. I am on the lookout for more chalkboards now-
I like the look. I will stop by for a visit.
Thank you for hosting.
Happy Thanksgiving!
xo Lisa S
Oh how perfect Lisa! Featuring when my link party opens tonight.
ReplyDeleteThank you sweet friend!
DeleteHappy Thanksgiving!
xo Lisa S