Friday, March 30, 2018

Another easy MOSS covered DIY- A Cross and Vase


                                                                  Get your glue gun out !

                  I have one last MOSS covered project to share for spring on this GOOD FRIDAY !


                   I am sorry if you are tired of the MOSS,  it seems to be my theme this season.


I found this wood cross at the .99 cent Store.
 
The moss was from Dollar Tree.
 
 
But
 
you could cut a cross from cardboard or foam board.
 
I painted the back green, just to give it a finished look.
 
I hot glued a POP TOP from a soda can to the back as a hanger.
 
 
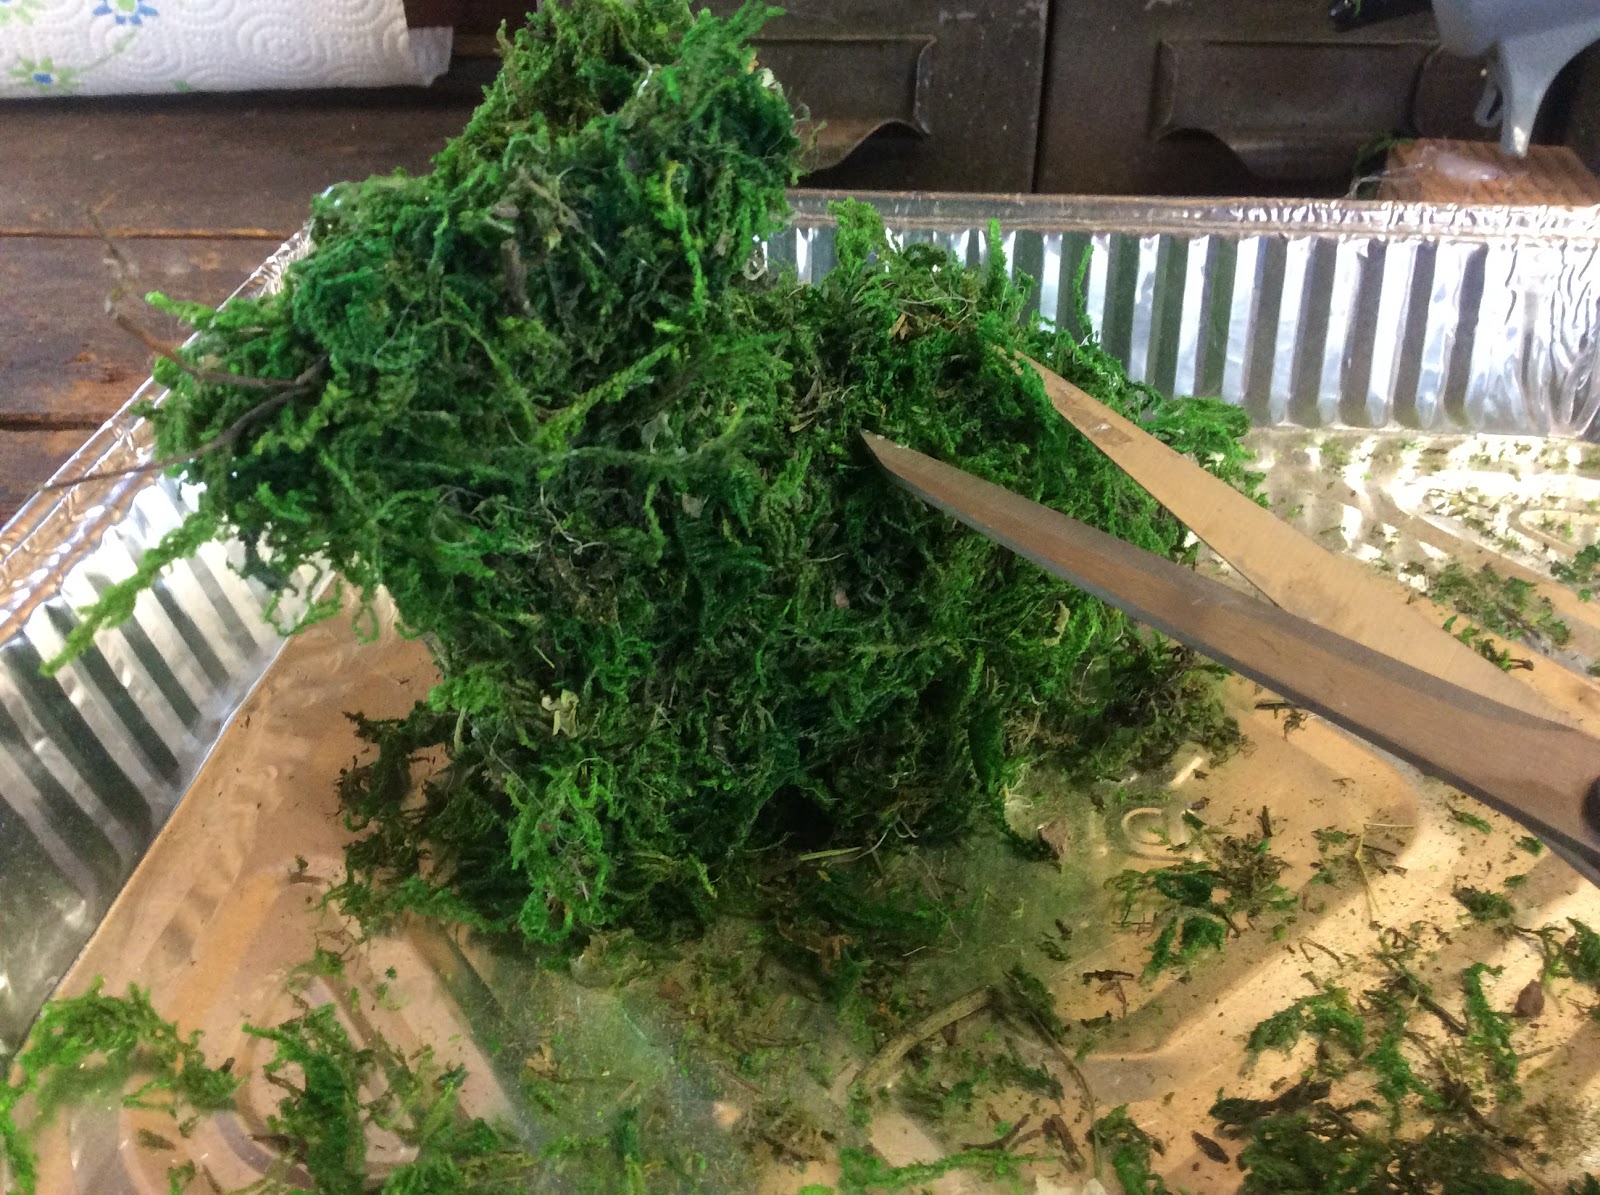
Next , start to cover with moss.
 
Trim with scissors. I added a bit of jute across the center.
 
You may want to add flowers tucked into the jute.
 
 
I decided to hang on a mirror, using a piece of wire.
 
 
I'm not sure if I like the flowers.


The other idea was to cover a Tin can with MOSS to use as a vase.


Clean can, and remove label.
 
Run a bead of hot glue over the edge to protect you from the sharp top of the can.
 
Lay on its' side and cover with MOSS.
 
Be very careful ! The can will heat up from the glue.
 
You don't need to put moss on the under side.
 
The can will not leak !
 
 
 Both projects used less than 1/2 of a bag of moss.
 
I decided to wrap with jute then filled with water and added fresh flowers from my yard.
 
This makes a pretty spring container.


Okay, no more decorating for SPRING !    I need to clean my house !
 
I have company coming and I can't wait.
 
I hope you have a wonderful Easter with family and friends !
 
xoLisaS


Thursday, March 22, 2018

Moss Covered Bunny / Dollar Tree Re-make

 
 I found this sweet little BUNNY at the
Dollar Tree a couple days ago.
He was white and covered with a chenille sort of ribbon.
Cute but I thought, I could change him up a bit.
 Well completely....


 Under the ribbon was this great sort of skeleton.
The ribbon came right off in one piece. No glue.
( I plan to keep the chenille for another project.)


I don't feel bad about taking it apart. For $1.00, I  got a great base for my project.
 
 If you don't have a Dollar Tree near you, I have seen the paper mache bunny forms
and that would work just fine.
 
I also purchased moss at the Dollar Tree.
 

                                                ( I only used 1/8 of the bag of moss )
 
and  24'' of jute
 
Hair spray as a fixative when completed (opt.)
 
 
I used a tray to control my mess, the moss gets a little bit crazy !
 
Warm up that glue gun !
 
 
I started at the top of the head and worked down the spine.
CAREFUL not to burn yourself.
 
Give a little squeeze to shape.
 
Just keep going and fill in where you need to and
 
 
trim with scissors. If you see spaces add more moss.


Tie a piece of jute or ribbon if you prefer around your Bunny's neck.
 
Give a light  covering of Hair Spray, this is optional.
 
 
I hope this has inspired you to look at some of the items at the dollar/craft stores a little differently.
The wreaths and some other holiday shapes work well as a base for a completely changed item for your home and décor.
 
Thank you ! xoLisaS


Tuesday, March 20, 2018

Vintage EASTER Printables for you !


           I think everyone enjoyed the Vintage Valentines and the St. Patricks' Day Postcards.


              If you missed it go over to the Labels on the right and look at PRINTABLES.

                                                              You will find  them there.

                             I thought I would share some EASTER cards and a couple of cut outs

                                                   for you to use in your décor or craft projects.


Wouldn't this be a sweet tag on a basket ?


Forget -me-not


Enjoy !
 
If you are looking for more you can check over at


I thought I would add a picture of my new baby chicks !
 
You can watch them grow on YouTube !
 
 
Thank you for stopping by !
 
Let me know in the comments what you
 
made with these cards and cut outs.
 
Have a Blessed Easter! xo Lisa S


Saturday, March 17, 2018

How to Paint a Vintage Suitcase


The title of this post sounds like I HAVE GONE CRAZY !
 
Usually  I am not the one who runs around painting everything.
 
One of my favorite things about VINTAGE is the old, worn and cracking patina.
 
I love the earth tones and warm colors of the past. I have quite a few pieces
 
of  vintage luggage, but there is always room for more. I can justify a purchase because
 
they can be SO useful for hiding I mean organizing.
 
I was helping a friend with a garage sale and she was throwing away a TRAIN CASE.
 
              She had been storing makeup...old make up...Avon makeup for YEARS in this case.  
 
You can probably imagine the smell.


 I was surprised that the smell did not linger. But sorry, in my opinion it was
an UGLY color. Since she was going to toss it I thought I could give chalk painting a try.


 I cut off the leather straps with scissors on removed the tray.

I gave it a good cleaning with Simple Green and a Magic Eraser.
You can use your favorite cleaner as long as you chose one that doesn't need rinsing.
I have found that leaving a Dryer Sheet inside helps with the musty smell.


I used Parisian Grey chalk paint and started on the inside first and let dry.
 It covered beautifully, with one coat.
I covered everything including the hardware.
A light sanding for a smooth finish, and used clear wax with a soft lint free
cloth to seal. It will feel like soft leather.


I was really happy  how it turned out.
I hope you will be able to find a  piece of luggage that will fit your color scheme, but if not give some paint a try. Suitcases are a great way to add some height and dimension to your home décor.
I love use the suitcases for display at my Craft Boutiques.


At my house they are up high....


....AND down low


I have an area under the counter were I used suitcase for extra storage.


Some are decoupaged with vintage looking wrapping paper scraps


One had some spots of wear and tear so I made color photo copies
of vintage map covers and travel stickers and used MOD PODGE
to  put them on the outside of the case.


I decided for now to leave it on top of a bedroom cabinet.


Later I add a rub on transfer to the existing label.


It is a little harder to find cases that are affordable, but maybe I

inspired you to fix one up that you my have otherwise have past over.

Happy Hunting! xo Lisa S


Tuesday, March 13, 2018

EGGS for FARMHOUSE and SPRING DECOR- 5 STYLES


      As you may know our family has enjoyed raising chickens for quite some time now,  so we

     are used to having eggs around. I have noticed that eggs have definitely become part of the

FARMHOUSE look. I  found this basket filled to the top with solid wood eggs at the  Good Will

                            Thrift Store.   I thought it would be fun to change it up a bit.

                    
                                                                         ,


        I decided to use White Chalk Paint on      
 
                                   EVERYTHING  !                                      


                                                  Earlier I had purchased a coco liner from
                        

                the DOLLAR TREE. It fit it the basket and I use hot glue to hold in place.


 I was happy with the way it came together. In the future I may decide to plant flowers in the basket.
 
 
And then-


         I found these plastic eggs at the 99cent store. They are made for painting and do not open.

      I bought 2 pkgs. They look so real, I left one pkg. as is. That is what I have in the first picture

                                                                  of  the  eggs in the box.

                                                       The other pkg. I decided to paint.


                                                      The Moss is from the Dollar Tree.

                                       Some of the eggs I painted with Black Chalkboard Paint.


                                          Some of the eggs I painted Robins' egg blue.
      I may add speckles, using an old toothbrush and a bit of paint flicking with your thumbnail.


Some of the eggs I used matte Mod Podge and small pieces of Dictionary pages.
You can cut out favorite pictures for top layer.


 I also used Mod Podge and scrapes of  tissue paper
from vintage dress pattern.
Just keep layering until you like the look and color.


                                                         This was my favorite.

             I hope I gave you some inspiration for adding eggs to your décor. xoLisaS


Faux Tin Tile Bunny

Hello My Friends!  Most of the Craft and Dollar Stores have some chunky cut outs for Spring! There are so many ways to decorate these. I use...