Tuesday, September 28, 2021

Time to update my Vintage Book Calendar

Hello my friend !

I hope you are doing well.

Time seems to get away from me theses days.

I don't have kids in school....or even a real job :)

I only 'work' about 7 hours a week,

so what's my problem ?

Well, speaking of time

I need to update my calendar

for next year.


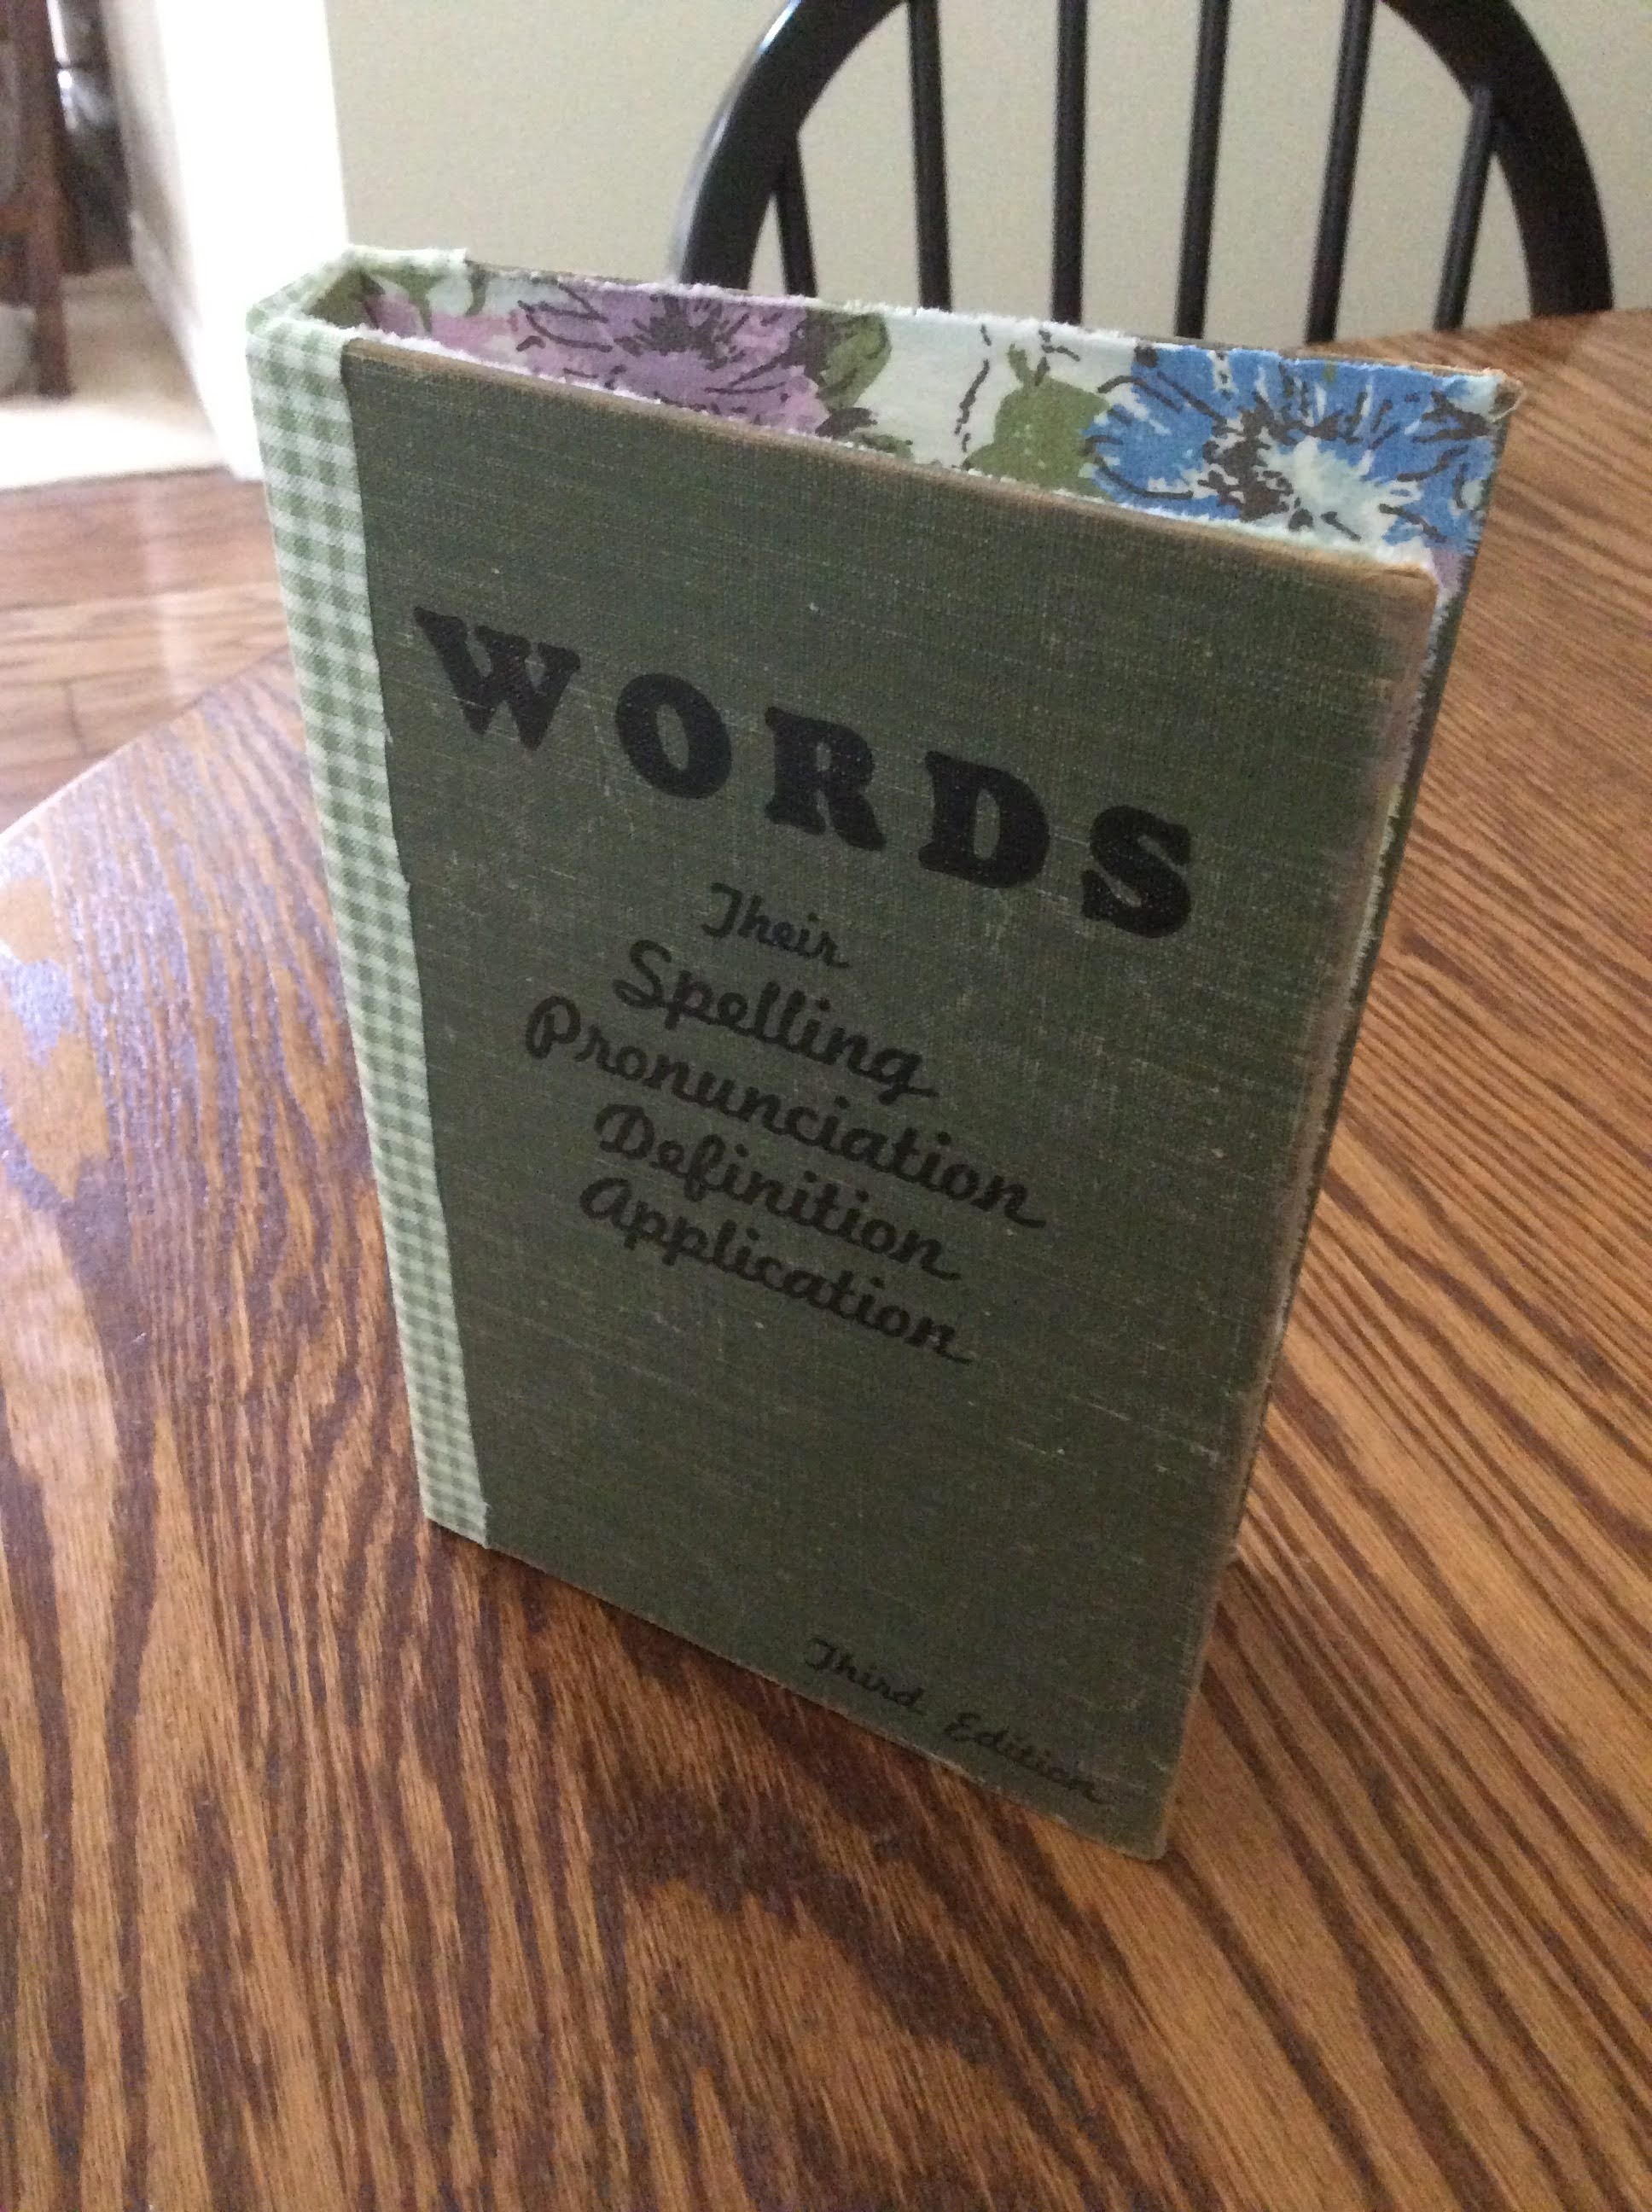
I use an old book cover and then replace the inserts.

My book is 5'' wide and 7 1/2'' tall

with a 1'' spine.


Perfect fit for these 5'' by 7'' weekly planners and calendars

 from the Dollar Tree.

I remove them from the plastic cover


I am using two-

one is a calendar and one is a weekly planner.


I open the planner to the center and remove

the staples.

This will be the center for the signature.

It will have to be a single large signature

 to keep the pages in proper order.


I have used Mod Podge and cloth to cover the inside

of my book. A strip of cloth was also added to the spine.


I use embroidery thread and a carpet needle to attach my signatures to the spine.

You can use large binder clips to hold in place.

I like to use 3 times the length of the spine when I measure thread.


Use an awl or sharp pointed object to start you holes.

I have a block of wood under the spine to protect my table.


Start center inside- with a 3'' or so tail

all the way through the book

to the furthest away hole-

then back inside the book

to the other end of book and out

then back through the center hole on spine

and tie off !

It is a figure 8 tied in the center!


The front page-


Both signatures are shown here.


You can re-use the cover next year.

Just cut the threads and add a new

planner. 


I always enjoy having a paper

calendar.

I need to see the big picture

when making plans.


This size fits in my purse!


Thank you for letting me share this with you today!

I'm so glad you are here!

Have a great week!

xo Lisa S


Tuesday, September 14, 2021

Using My IOD Stamps


......for the first time!

Hi my friend-


I was at one of my local Antique store and found these


IOD Stamps [ Iron Orchid Designs ]

Crock  Labels


There are 13 different stamps in the set and that seemed like

a pretty good value to me.

These stamps are big!

 The best part is they are flexible

for stamping on curved surfaces and clear for easy placement.


According to ironorchiddesigns.com 

there is a little prep work needed before you get started.

They suggest using a fine grit sand paper on the stamping

side area.

Sanding lightly one direction across all stamps

 then the opposite direction.

This will help with all mediums used.


It's up to you if you want to cut apart the stamps.

This works better for me-


I still have more yogurt jars and some pots to decorate.


I just painted the jars with chalk paint.


I wanted to try stamping on air dry clay and add

the label to the jars.

I love this MODEL MAGIC CLAY by Crayola !

It was about $5 at Joann's  Fabrics- less if you use a coupon.


It is so soft and no crumbling mess!

It didn't shrink or crack.

I highly recommend it!


I just rolled a small piece to 1/4'' thick


Just pressed stamp into clay


This method made the best impression in my opinion.

The stamp did not stick to the clay :)


I used a bit of Tacky Glue and attached the clay to the jar.


I used a knife to cut away some excess.


The jars and pots dried overnight.


I used a small amount of Burnt Umber acrylic paint and water

to make a 'WASH'


I painted the recessed parts with the wash and wiped

off extra as I went-

This took some time and it seemed to look better 

with more and more layers.


When I was happy with color,

I went over the high parts with another dry brush

coat of chalk paint.


On the left I used a Burnt Umber wash

on the right I used a black wash.


 I love how these Marmalade crocks look :)

These sunflowers dried this way and I'm going

to keep them !


Early fall mantle- with a reminder to my dear husband-

don't be sad about your brown lawn !


This one is my favorite!


Which do you like better-

the brown or the black ?


Let me know in the comments-

xo Lisa S


Tuesday, September 7, 2021

Repurposing an Expandable Rack into a Shelf


Hello my friends!

I think just about everyone has come across these racks

while  thrift shopping-


They are great for hanging coffee mugs,

jewelry, scarves, belts, keys, light jackets-

Just about anything you like.


This project really doesn't need any

instructions.


First, I removed the hanging hardware.

Then reattached the direction I wanted the shelf to hang.


I used Black semi gloss spray paint my rack.


For the shelves, I used some wood scraps cut to 12'' long.


I love Briwax in Dark Brown!


The shelves were stained and sealed.


I attached the shelves with staple gun.

After the shelves are attached the rack will

no longer collapse.


Nice shelf for a  tiny wall space!


I left the hooks in the center.

You can remove those hooks if you prefer.


Thank you for letting me share this project with you!

xo Lisa S

Faux Tin Tile Bunny

Hello My Friends!  Most of the Craft and Dollar Stores have some chunky cut outs for Spring! There are so many ways to decorate these. I use...