Friday, December 22, 2023

Merry Christmas! More Clapsaddle Postcards


Hello my dear friend!

Wishing you a very 

Merry Christmas!

I'd like to share more from my

Ellen H. Clapsaddle postcard collection.


This sweet card says-

Sunshine would not be sunshine,

Skies would not look blue,

Christmas would not be Christmas

without a thought of you!


xo Lisa S


Tuesday, December 12, 2023

Gift for a Puzzle Lover


Hi Friend!

What does a puzzle lover want

for Christmas ?

Of course more Puzzles!

My Mom and Dad love puzzles.

They have a puzzle in the works at all times!

You will find my parents...just starting a puzzle....

almost done with one...or immediately starting another!


These will be wrapped up for 

Christmas gifts.


Mom and Dad will like these !


What they really asked for was a repeat gift from last year.

They actually wore out the first one!

I made them a 

Puzzle Board 

I'll share with you how I made it.

You will need the following items-

Black Felt 1 yd.

Any color if fine, black is easy on the eyes.


Scissors

1 Sheet- Black Foam Board

(Dollar Tree 20'' x 30'' $1.25 )


Spray Can of  Multipurpose Adhesive

Hot Glue


Lay out the felt on a flat surface.

Cut 1 piece the actual size


 of the board and set aside.


Cut another piece of felt 

an inch larger all the way around

the board.

This piece is the front.


Use spray adhesive on the board, center over the felt

piece that is the larger 'front' piece.

Smooth out the felt with your hands.

Get your glue gun ready-


Start to fold over the edge and glue down.

Be careful not to burn your fingers...
.
continue slowly all the way around the board.


The front looks great!


Flip the board over and glue down 

the first piece of felt.

This piece will cover the edges.

Trim with scissors if needed.

That's it-

Now when working on a puzzle it can easily

be moved if needed!

Great idea for other games too.

How about LEGOS ?

The board can easily slide under a bed or sofa.


I wrapped it up and put it under my sofa

until Christmas.


I love to display some of my vintage games

under the tree.

I recently added a couple of puzzles,


This Whitman puzzle from 1960 was originally a dollar!


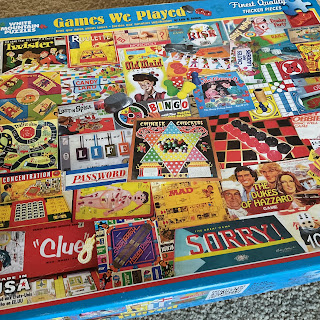
This newer puzzle was covered in vintage games!

It fits our family-


With a large get-together it can be fun to leave a puzzle out

-those who want to can join in.

The Puzzle Board can be moved

when the table is needed for drinks or cookies.


Merry Christmas!

xo Lisa S


Tuesday, December 5, 2023

Paper Bag / Book Page Stars and Snowflakes

Hello my friend-

How have you been?

When it comes to decorating for Christmas,

I usually tear into all my boxes and make a huge mess all over

the entire house!

This year I'm trying my best to go 

nice and slow, cleaning as I go...


The tree is done so I moved to the mantle-

I wanted something different this year.


I have been seeing Paper Bag stars all over.


My friend Carol 

at The Answer is Chocolate shared last week -

Carol has easy to follow instructions.

Then

 BETTER HOMES AND GARDEN December issue came!

I had to give it a try!


Extremely budget friendly-

 I found Lunch bags at the Dollar Tree

30 bags for $1.25


I went with a basic design.


I cut 8 bags per star.


As long as the bags are laying the same direction

You can glue either side.

I used hot glue, run a line of glue down the center.

Then across the base.

Wow! 

When the stars are open they are beautiful!


I wanted to try and make some stars

with book pages.

Pages were folded into thirds.

Glued down center and base.


I used scissors to cut an easy shape with triangle cuts

on the side folds.


I cut and cut-


I cut and cut and cut....I did not think I had a full

star until I made 25 pages!!!!


I used a paperclip to hold them open.

I love the look but It took so long to make!


I think I will stick with the lunch sacks!

They were so easy.


I used fishing line to hang the stars.


I put them up last night and them made a couple more

this morning.


I think I'm done-


I think I will be adding more as the days go by-


After the holidays, remove the paperclips

 and the stars will fold to close.

They can be used again.


Do you think I need more?


I'm so  glad we could be together today!

xo Lisa S

Friday, November 24, 2023

Vintage Button Trees

Hello my friend!

Thanks for stopping by-

I know I'm not alone when it comes to collecting buttons.

It just happens!

When I was a little girl, I loved playing in my Grandmas' jar of buttons.

So many unique shapes, colors and sizes.


Let's make some easy ornaments

using buttons.


Things you will need:

You will need a few buttons, about 12

in graduating sizes for the tree-

plus about 4 small buttons approximately

the same size as each other to be

the tree trunk base


1 piece of  24 to 26 gauge wire, 12'' folded in half

and 

wire cutter/ pliers


Lay out your graduated buttons


Start at the base of the tree.

'thread' the button through the wire.


Continue up the trunk-


Begin your tree with the largest button

and work upward.


If your button has 4 holes-

thread wire across as shown.


Keep adding buttons

until you are happy with the height of your tree !


My trees are short and fat!


Tighten and twist a couple times using pliers.

Cut 1 wire, make a loop

with the other wire end .


Wrap the wire around the base over the cut wire.

Use pliers to tuck in sharp ends.


Easy!

Now you have some ornaments to

hang or give as gifts-


Add ribbon if you like-


The trees were big hit at my craft show!

I hope you have a great week!!!

xo Lisa S


Note: I also made Snowmen- But I sold out

and only had one picture.


Sewing Pattern Journals

  Hello my friend ! I'm back with another Junk Journal. If you like thrifting like I do, you probably find patterns available all the ti...