Showing posts with label chalkboard. Show all posts

Friday, November 5, 2021

How to Stencil with More Than One Color

Hello my Friends!


Last week I found this new Chalkboard at one of my favorite Thrift shops.

It was $2.50- I had to get it.

In my mind it's already done half the work for me!

You can make the sign your choice, tall or wide.

I didn't even have to paint it and it is already framed.


Nice size too- 17''x 23''


Even the back side was in good condition.


I decided to make a Christmas sign with a couple

of stencils I had received as a gift.

I thought I could show you how I used more than one color

on the sign.


I use a thin plastic cutting board and Painters Tape to block parts of the stencil

I don't want to paint.

Painters Tape is not very sticky and it 

will not damage

your stencil. 

Some stencils are very delicate.


These are the colors I will be using,


First I decided to stain the frame.

I taped off the front and the back.


The chalkboard was made with natural wood.

I used Walnut BRIWAX and a soft cloth and gloves.


I use an old toothbrush to get in the corners !


Just a reminder !

 You can flip stencils over if you like objects facing the opposite direction.


First I planned the placement of the truck.

I used the plastic sheet and painters tape to

block out everything near the truck bed panels.


I painted the the panels brown.


Make sure the paint is dry before covering 

with what you are using to block

the next layer.


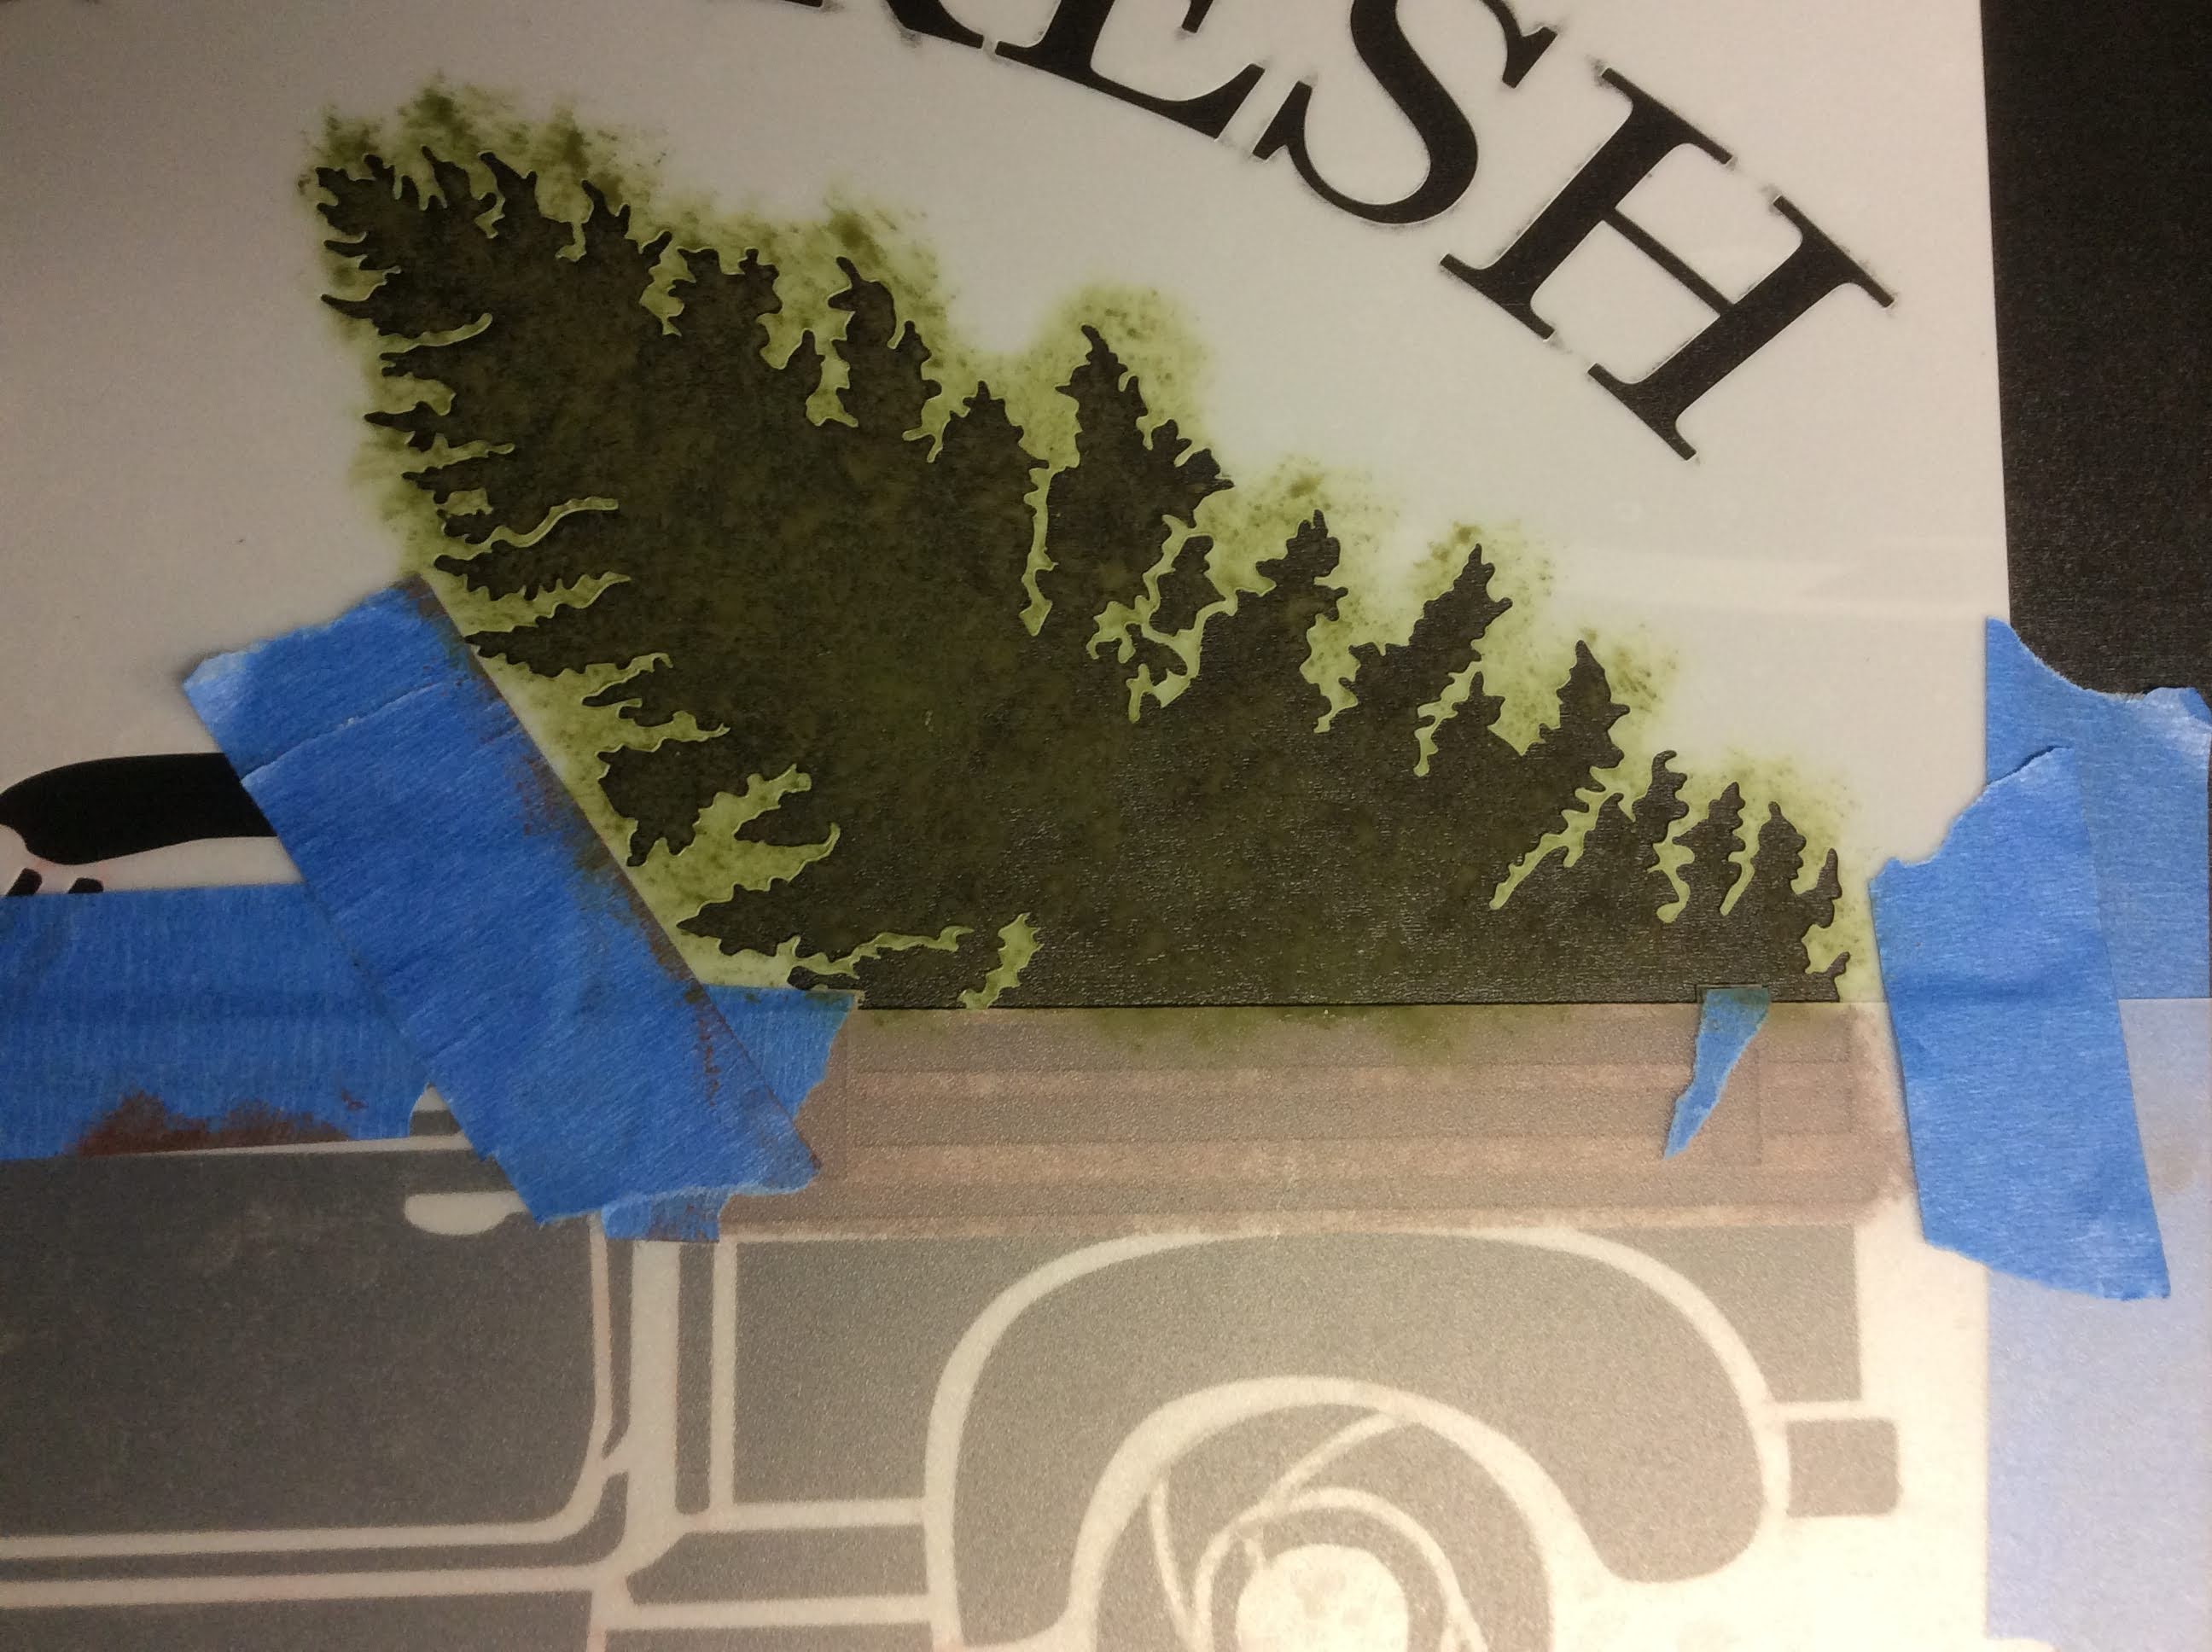
I used my sheet of plastic along with tape to

cover and block the panel area that was already painted.

I painted the tree green.

I left open space for the black board to show through.

It gave the tree more dimension.


After the tree was dry

I painted the truck red,  and the tires white.


I moved the stencil up on the board

and taped it in place.

I stenciled the lettering in white.


After the FARM FRESH dried, I taped down the other stencil

with CUT AND CARRY.

While that dries, I did the lettering on the bottom of the sign.


If you like an overall chalkboard look,

lay a piece of chalk on its side and


gently cover the entire chalkboard.

Wipe with a soft dry cloth.


I left room at the top to personalize with family name.

You could use regular chalk or chalk paint pen.


Here are the two stencils that I combined tp make 

this sign.


Here's a close up !


I am so excited for Thanksgiving, but

just needed to start early on some Christmas decorations.


Tell me if you are excited for Christmas !

xo Lisa S


Thursday, January 7, 2021

My Winter Mantle and a Tip to Memorize Scripture

 Hi Friends!

When Christmas is over

and everything is put away until next year,

I think the house looks a bit empty.

Do you feel that way?

For now-

I like to start with the mantle-


I had made Hot Apple Cider during the Holiday's.


I saved the jug from the recycle bin-

washed and soaked off the label,

used acetone to remove the expiration date.

Then I put it on the mantle with a couple cotton stems.


Hung some beads.


And that's the winter mantle for now-


I usually change my chalkboard weekly.

Starting in January, I'm trying to refresh my memory of the book of James.

I want to share with you a little tool I use to memorize

larger sections of scripture.

I first write out the section- I'm a visual learner!

James 1: 2-4 


Next I start to remove key words.


Study by reading over a few times,

 then you can fill the words back in, 

OR

Keep erasing words until you have it memorized.

A chalkboard works great for this.

As I get older it is SO MUCH HARDER to memorize scripture.

I'm hoping that this may help someone else.

Maybe you have some suggestions to share with me :)

I study with the New American Standard Bible ( NAS )


XO Lisa S

Thursday, October 3, 2019

Shovels into Pumpkins


Hello October!


I thought about decorating my front porch.....but it's still in the 80's here!

Way too hot for real pumpkins-

I  took some shovels from the backyard, brought them to my side gate.

Then propped them up against some old crates and chicken nesting box.

I wanted to make them look like pumpkins but did not want to make it permanent-

so I used some colored chalk I had on hand.


I used yellow but you really can't tell by the picture.


Draw faces or write something creative- If you don't like it just wash off and start again.


I nailed the birdhouse to the top of the shovel.


That's about it for the side of the house.


Just wash off with water!

Wouldn't the kids think this was fun...I did!

xo Lisa S


Tuesday, October 23, 2018

Easy Christmas Chalkboard

 
 You can use thin scrap wood for this project.
 
Paint with flat black paint.
 
If you don't have any thin scraps you can get a Mini Chalkboard
 
at the Dollar Tree. The Chalkboards are 6'' x 8''.
 
They are made of Masonite and they are double sided.


I drilled small holes at the top of Chalkboard and used Jute to make a hanger.


 I used a wet sponge brush with just a drop of white acrylic paint
 
to give a whitewash effect.


The ribbon that I used was 5/8" wide.


I had these chenille stems on hand. You can find these at the Dollar Tree
 
12 stems for $1


I just looped ends together to make a mini wreath shape.


I used a 4'' piece of ribbon to cover the connection point,
 
then flipped the wreath over.


Then used hot glue to attach to the board.
 
I cut another piece of ribbon about 6 " to make a small bow.
 
Attach with hot glue. 


You can use a chalk marker or paint pen to add your sentiment to center of wreath.
 
 
Here is one finished. It took about 5 minutes to make!
 
So....of course I made more. Until I ran out of chenille stems.


These are ready for the Craft Show!


I'm sorry if it's too soon to think about Christmas, but I wanted to share some of the things
 
I am working on this week.
 
xo Lisa S


Vintage Linen Tissue Pouch

  Hello ! I had a day off work last week  so we went to a local Flea Market. We had a good time walking around, enjoying a beautiful sunny d...