Sunday, July 29, 2018

How to do a Reverse Stencil Technique on a DIY Mirror


Another Thrift Store frame is needed, this one was 10'' x  21- 1/2'' with CLEAR GLASS
 
The frame was made of wood and in good condition, painted gold
 
 with glass and white matte board.
 
Later we will use wax to tone down the gold.
 
Plan to make your mirror as big as you like, because the glass will be a fraction of the weight of
 
a regular mirror. You will not have to use any special hangers for your mirror.
 
 
Use glass cleaner on both sides of glass before you begin.
 
 
I prefer this type of picture frame with permanent tabs. It is easy to pull back the tabs to
 
return the glass to the frame.


Fold back taps and leave glass in the frame.
 
We need to see the frame for the proper placement of stencil.
 
Remember we are working on the back side of the glass.

 
I chose to use Gold Acrylic Paint. I thought the metallic paint would look more like
 
an authentic vintage label. I think it was .99
 
 
Black Acrylic paint
 
and a stencil brush


This is the stencil I used. 
 
Stencil 6''x6''
 
 
I taped over part of the design, I will use it later.
 
 
TAPE TO GLASS UPSIDE DOWN !
( That means you can not read it )
 
 
This paint seemed to be thinner consistency than other Acrylic Paints
 
so SHAKE WELL.
 
make sure your brush is dry.
 
 
After the Gold completely dries come back over the Gold with Black paint
 
This gives extra dimension to your lettering.


Now you can remove the stencil.
 
 Then I did the same steps on the top were I placed the monogram design.
 

Wash your stencil with warm soapy water.
 
You can carefully remove your glass from frame.
 
~Remember you are working with sharp glass.~
 
 
If you like you can add a wax to seal your frame.
 
I used Folk Art Antique
 
 
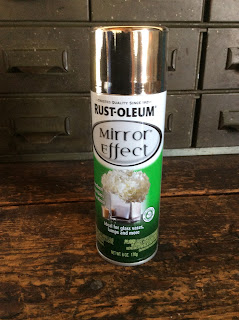
You will need a can of MIRROR EFFECT
 
 
You will also need a can of flat Black
 
 
We are working from the bottom layer out.
 
You will FIRST spray the Mirror Effect over the top of your stencil and cover the whole
 
mirror. The paint is on the back side! LET DRY.
 
Gently lift  and look underneath you will see your beautiful stencil....and your beautiful face.
 
If you can't see yourself spray another coat of Mirror Effect.
 
When your mirror is to your liking and it is dry.
 
Spray the black paint over the silver. You are still on the back side.
 
All silver mirrors are backed with Black.
 
Any imperfections will make your mirror look aged and wonderful!
 
The more flaws the better-
 
If you accidently scratch the black just touch it up


This shows the first layer of black over the silver.
 
 
After it is  dry you can flip it over.
 
And take a peek~!
 
Time to put it in the frame.
 
Ok now you should be able to read your stencil.
 
The glass is on the front side and you will be will be able to clean the mirror.


Ready to hang


So hard to photograph because of the reflection!
 

Safe to clean the glass because all the painting
 
is done behind the glass.


So sorry about the bad lighting! I just couldn't get it right.
 
The mirror is much more beautiful in person.
 
 
At night with the reflection of the candles.


The faux topiaries were made by just setting a faux boxwood ball on top of the vase and urn.
 
The boxwood balls were from the Dollar Tree.


If you don't want to stencil the mirror you can leave out that step but it really
 
gives you a unique piece of art for your home.
 
This technique would work well on vintage glass windows.
 
With the left over paint ( if you have some) I painted the outside of a BALL CANNING JAR!
 
I also painted the CANDLE HOLDERS!


I really love the combination of Black and Gold!


I hope that I have inspired you to give this a try~
 
If you have any questions please leave a comment and I will get back to you.
 
xo Lisa S


Sunday, July 22, 2018

Repurposed Vintage Jewelry


I bought a HUGE  bag of miscellaneous Jewelry at the Thrift Shop
 
this week. It just caught my eye. I don't know why, I don't even wear jewelry.
 
I'm not a real ''girlie girl'', but I do love to dig around in a bag of vintage anything.
 
I could spend hours sorting through buttons!
 
 
Most of the treasures ended up being Pins and single clip on earrings.
 
Some were missing their clips so I decided to make them into magnets.
 
 
All I needed was some E6000 glue and some magnets.


I love these mini E6000's!


Here are the magnets


On a tray.


The magnets hide among the flowers.

 
On a Tin Board in the kitchen.


I found these blank adjustable rings at Joann's Fabric Store.
 
 
Easy, just a dot of glue


An instant collection !


I had some tacks in my desk and thought I would
 
make some Gem and Flower Pins for my bulletin board.
 
 
And with just a dot of glue!
 

They look pretty on my bulletin board.


 Book Jewelry


I bought some jumbo size paper clips at the Dollar Tree


They can be used as Book Marks
 
or maybe just pretty accents in your journal.


 Nothing you haven't seen before but
 
 I had fun making these !
 
Thank you for spending some time with me today!
 
xo Lisa S


Tuesday, July 17, 2018

DIY Chalkboard from Thrift Store Print & Chalk Stencil Technique


 18'' X 36''
 
 
This is the picture that I purchased at the Thrift Store. I was happy with the price- $4 
 
When I brought it to the counter the nice lady said, '' Pictures are 1/2 off today'' .
 
Even better for $2


 The first thing I did was wipe off the dust and then
 
remove the picture from the frame.  You can leave the picture in the frame to paint but then
 
you will need to tape off the frame.
 
I prefer to remove the picture for a cleaner edge with no lines.


 The picture was lightly textured paper, but in great shape with no tears and not warped.


In the past I have used Chalkboard paint and a brush, I have also
 
used Chalkboard spray paint.
 
NOW I just use FLAT BLACK SPRAY PAINT.
 
I used about 2-3 coats and let dry
 
 
In my opinion it works the same for a fraction of the price. 


 I gave the frame a coat of wax. I used Folk Art Antique,
 
Wipe off excess.


 Reattach the chalkboard to the frame.


 To ''Season'' your Chalkboard:
 
Lay a piece of chalk on it's side and rub gently across the entire board.
 
  
 Like this! 
 
 
Lightly wipe with a soft cloth!
 
Do it twice if needed.


 I wanted to add a stencil to the chalkboard. You could use white acrylic paint
 
to make it permanent but I want to share another option.
 
 
stencil 12 x 12 
 
 
Place the stencil were you like it. Use a ruler for spacing and leveling. 


Fill in the area with chalk!
 
Chalk also comes in different colors.
 
Remove stencil.
 
You can clean it up with a soft cloth-
 
If you don't like it wipe off and try again!


If you love it and don't want it to be wiped off, use a coat of  MATTE CLEAR SEALER
 
to finish. Do not spray blank area or area if you want to change later.


 The blank section can be used for Memos, Grocery List or COFFEE BAR MENU.


I love Coffee !


Here is another example I made with a Thrift Store Print
 
repurposed to a Chalkboard. I have it on our mantle and I try to change the verse every week.
 
Pleasant words are like Honeycomb. Proverbs 16:24


 Please take a look at my BLOG HOP page to see where I Party!


Thank you for visiting. If you try this technique let me know.
 
I would love to hear from you, I read and respond to all comments.
 
xo Lisa S 


Holiday Boutique Best Seller Hostess Gift

Hello my friend!  Today I want to share with you some of the projects I started working on for the Holiday season. For me, my first craft sh...