Sunday, February 23, 2020

Vintage Inspired Easter Vignette

Hi Friends,

I've been having fun playing with some Easter scenes.

These Vintage inspired scenes are filled with wood ornaments,

baby fuzzy chicks, chenille paper dolls and salt and pepper shakers!

All on top of a re-purposed ribbon spool.


I started with an empty ribbon spool.


 I added ribbon to cover the paper spool.


Then covered the label with scrapbook paper.


In the back I glued a wood fence.


Then I glued down my paper doll and pink tree.


Basically the doll is made with bumpy chenille stems


Cut 1 piece with 3 bumps


 Top is for head support.
Arm piece twist at neck.


Cut a square of crepe paper, cut small center hole.

Pinch head to slip on square piece for top of dress.


 Add a  gathered crepe paper dress and a cut out a face from a greeting card.

Use pliers to curl up feet and hands.


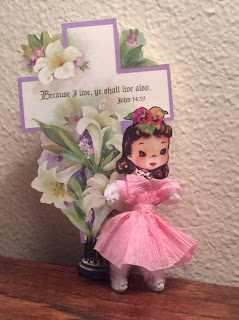
Here's a little girl-


I added some wood toys and fuzzy chick,

and glued some roses to the fence.


Here is the view from the back.


I covered this spool with some grosgrain polka dot ribbon.


Covered the label with white card stock. I added the white pipe cleaner to the edge.

I started in the center, glued down the salt shaker then

added wood eggs , chick, bunny and flowers.


Here is the back side.


I made a wire pick to hold an Easter card.


This vignette was on a full roll of vintage gift wrapping ribbon 

I picked up while thrifting.

I didn't cover the label on this one-

The bunny is a salt shaker too!


Here's the back side.


Here I added the crepe paper trees from yesterdays post.


I had fun! I hope you enjoyed hanging out with me.

Thanks so much, it means a lot to me to have you here. I really appreciate the visit!

xo Lisa S


Crepe Paper Trees

Hi Friends,
I love Crepe Paper Streamers ! I really don't know why-
 something about them just says "PARTY"!
Rolls are inexpensive and easy to find. 
I wanted to make some trees to use for background decoration for my Easter display,
at home and for upcoming spring boutiques.


All You Need - a styrofoam cone, hot glue, crepe paper streamer,

and optional clear glitter or mica snow and tacky glue.

Dollar Tree has bright primary colors, white and pink.

I first covered the base with multiple strips of paper.


Pinch and continue around the cone.


Pinch at the top.


With 1 roll of Pink, I was able to make 3 trees- 10 1/2'', 6 1/2 '', 4 1/2'' and had more left over.

I had a couple of rolls of white steamers that had yellowed with age.

I added blue watercolor paint to a shallow dish of water.

The paper was then dipped into the water on one side then the other.

This is how I achieved the ombre look for the blue tree.

Set your roll on a cloth and allow a day to let your roll thoroughly dry.


First cover the base.


Have you seen these silicone finger protectors?

They really work.

I was have trouble using them,I kept touching the glue with the other fingers!


Start at the bottom and work up.


I really liked the pale blue edge.


After I was finished I decided to add this leftover iridescent mica Christmas snow.

Just run a thin line of tacky or white glue at the edge or ruffle and add glitter or snow.


These trees will be used in SPRING, but other events come to mind-

maybe wedding, baby shower, birthdays and Christmas.

I will share pictures of how I used these in my display.

Thank you so much for visiting.

xo Lisa S


Tuesday, February 11, 2020

How to Fold a Napkin into Heart Shaped Pocket

       Hi Friends!

         Here's a easy way to fold napkins for your Valentine's table.
     

I used cloth napkins, but just so it will be easier for you to see

I'm going to explain the folds with paper...ok?

Napkins are square, so our paper is square.


Fold in half


and fold again lengthwise


fold again just to make a crease.


Fold upward, making a point at the bottom.


Then on the other side.


Flip over this is the pocket.

Yeah! see the heart yet?


oh no fuzzy!

A third of the way across, fold down corners to the back.


How cute!


Back to the napkin!


Give it a good press with a hot iron if the napkins give you trouble.

Looks good on the plate-

I added silverware, but of course you could add a gift or candy to your pocket.


I have a couple Fiesta Ware plates in pink and red that I plan to use.


I hope I explained that well!

Thank you so much for letting me share with you today-

xo Lisa S


Orange Spiced Hot Cocoa Espresso for Two

Hi Friends,
Here's  something you can share with 
your sweetheart on Valentine's Day.


Orange Spiced Hot Cocoa Espresso

1 cup any type milk- I used almond milk
1 cup brewed coffee- I used espresso
2 TBSP. unsweetened cocoa powder
2 scoops Collagen powder- Optional- I get mine from Trader Joe's
2  TBSP. sweetener of your choice- honey or maple- I used Agave syrup
fresh peel from 1/2 an orange
1/4 tsp. whole cloves
1/4 tsp. ground cinnamon
Garnish: Whipped cream and cinnamon stick


Adding the Collagen is optional....but really I would love to encourage you to start adding

this to your diet.  Adding 2 scoops gives you another 11 grams of protein.

I put it in my coffee everyday. You can't taste it.

There are vegan and vegetarian powders available also.

It's great for skin, hair, joints and connective tissue.


Directions:

Add all ingredients except orange peel, to a small sauce pan.
Use a small whisk to combine.
Warm on medium heat, while whisking.
Add orange peel, when thoroughly heated, 
strain through a sieve to remove spices and peel.


Garnish with whipped cream and cinnamon stick, sprinkle with cinnamon sugar.

Serves Two!


Enjoy and Happy Valentine's Day.

xo Lisa S

Holiday Boutique Best Seller Hostess Gift

Hello my friend!  Today I want to share with you some of the projects I started working on for the Holiday season. For me, my first craft sh...