Monday, July 27, 2020

Thrifted Clipboard

Hi Friends!

How are you ?

I mean it I really want to know :)

I sure hope you are well and taking care of yourself.

Are you able to get out of the house a bit?

We are so restricted here in my part of California.

I went out looking for SOMETHING TO DO!

There was nothing very interesting...but

I found an old wood furniture leg and a small clipboard


I flipped it over. 

It made a very sturdy base.


Then used a saw to cut a slit in the top.


I made it wide enough to hold the small

clipboard.


That's all I did.


I covered both with white chalk paint.


I used a damp cloth to wet distress the base.


Just had to stencil the clipboard to give it some interest when the

clipboard is empty.


Then added felt to the under side.


It could hold a TO DO list or recipe card.


It was just the right size for my calendar.


That's it for now-

Thank you for being here!

Take care:)

xo Lisa S

Saturday, July 18, 2020

Getting Back to Oil Painting - Beginner Tips and Project


Hi Friends,

When I was a teenager I started Oil painting. I really enjoyed it.

It has been a VERY long time, but this seemed like a good time to pick it up again.

Have you thought about giving it a try?

You really don't need to spend a ton of money to get started.


Here are a few things you will need:

  • Oil Paints – Buy the best you can afford.  This is where you want to spend your money, because artist-grade paints have more concentrated pigments, so you can mix the colors without making mud.  I like Windsor & Newton. I found this beginner set on Amazon. 
Oil paints will not dry out in the tubes like acrylics,
 you can use a set like this for years.


This set contains 10 basic colors. Even more than you need to get started.


  • Gamsol (This is to thin the paint and clean brushes.  You can also use turpentine, paint thinner, etc.) – You can find this at Michael's crafts.
  • Container for Gamsol/solvent (You can also use a glass jar with a screw-on lid) – 


  • Canvas panel - I found mine at the Dollar Tree. I found both styles, but I think I like the flat canvas 
                                                             board best for the small paintings. 

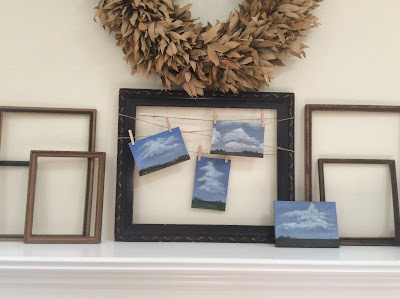
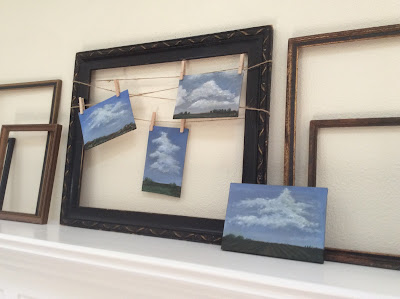
I'm having fun with these 4" X  6" postcard size boards.

This is what the back sides look like.


  • Palette – I use a wood palette, but you can order a glass one (white or gray), a paper palette , or use a paper plate, a piece of cardboard, or even parchment paper used for baking.
  • Paper towels-For clean ups and blotting.
  • Soap to clean brushes & hands – I use Murphy’s Oil soap to clean my brushes and baby oil to clean my hands.  You can also use an olive-oil-based soap or any soap that will clean off oil and grease.
  • Easel – optional- You may want to prop up your canvas against something sturdy
  • Brushes – I am using just a couple of small brushes. I found a set of 3 at the Dollar Tree. They worked surprisingly well. I had a pallet knife to mix paint, you could probably use a plastic knife for mixing. Keep your oil brushes separate from other brushes.


Squeeze a dime size amount of paint on your palette paper.

For my landscape I used only these colors-

Titanium White -Ultramarine Blue - Burnt Sienna -Burnt Umber-
 Cadmium Yellow -Viridian Green 


There's nothing as intimidating as a white blank canvas!

Let's change that.


I used a little Burnt Umber mixed with Gamsol.

Painted the entire canvas with my wide brush.


Mixed some Viridian and Burnt Umber for my

horizon line.

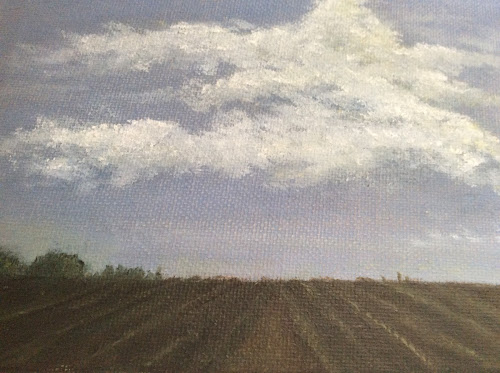
I decided where I wanted my clouds.

I used a paper towel to blot away the paint.


Mixing Blue and some white to paint the sky.

The sky will be a lighter blue at the horizon.


Use small strokes and layer your paint colors, dark to light.

There is no wrong way to make your clouds!

If you don't like your painting, step away and come back to it later.


Oil paints are very forgiving, 

You can make changes up until your paint dries....and there are ways even after that!

Depending on how thick your paint is it could take a week to dry.

These mini paintings are just for fun and don't need a lot of detail.

You can use a pencil to draw on the canvas if you are not feeling

confident. I say go for it!


When I was finished, this was my palette.


My beautiful mess!


If you have a lot of paint left at the end of your painting session ,

fold over your paper and save in a ziplock bag.


I found this great box at the thrift store to keep me organized.


That was so much fun, I had forgotten how relaxing it is to paint.

I can't wait to get more of the mini canvases.


Tell me in the comments if you are picking up an old activity

or are you learning something new.

Thank you for visiting.

You are the best!

xo Lisa S


Saturday, July 11, 2020

Chocolate Zucchini Bread

Hi Friends,
I'm just enjoying the lazy days of summer, not a whole lot has been happening here....
and it's hot!
I don't post many recipes but today I thought I would share a favorite.
The zucchini plants are producing non stop. So far the neighbors are enjoying the bounty,
 but soon I know they will hide when they see me coming with more zucchini.

We love this recipe, it's a nice change from plain zucchini bread and it makes two loaves.
The loaves freeze well too!


CHOCOLATE ZUCCHINI BREAD

2 eggs , beaten
1 cup unsweetened applesauce
 ( this is a substitute for oil )
1 3/4 c. sugar
2 TBSP. vanilla- yes that's right
2 1/2 c. all purpose flour
1 t. salt
1 1/2t. baking soda
2 1/2 t. baking powder
1/2 c. baking cocoa
1 tsp. cinnamon
2 c. grated zucchini


optional:

1/2 c. chopped walnuts
1/2 c. chocolate chips

Grease and cocoa 2- 9"x5" loaf pans.

Blend eggs, applesauce, vanilla, cocoa and sugar in a large bowl.

 Add the zucchini to the wet ingredients.

 Add the the rest of the dry ingredients.


Divide batter into 2 loaf pans.

Bake at 350 degrees.

Check at 55 min. 

If your toothpick comes out clean it's done. If not add 5 more mins.!


Cool and slice!


When you grease and use cocoa instead of flour it does not leave a white

mess on the sides of your bread.


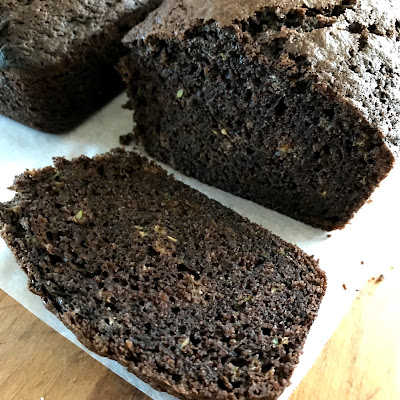
                 You can see a bit of zucchini hiding in there, but you only taste the chocolate :)


Let me know if you try my recipe.

Have a wonderful weekend!

xo Lisa S


Sewing Pattern Journals

  Hello my friend ! I'm back with another Junk Journal. If you like thrifting like I do, you probably find patterns available all the ti...