Monday, January 28, 2019

How to Make Personalized Faux Birch Candles

Hi Friends!  Welcome
 
Do you have about 15 minutes to spend with me today ?
 
That's all the time we are going to need for this project.

 
Remembering young love and carving your initials in a tree !

I never did but it looked like fun....we're going to use a candle.

 
First you will need to run around the house to find  some pillar candles.

At least one..... did you find one ?

 
You can use a real candle or a battery powered type. I'm going to show you both versions.
 
If you use a battery powered type make sure it has a wax coating.
 
 
You will also need a few toothpicks


Dark Wax -


I used FOLKART Home Décor Wax in Antique Brown

( the type usually used  with chalk paint )
 
That's it !  


I started with the regular Pillar Candle.
 
This candle was white and  6 " tall.


I began with scratching our initials into the candle with the toothpick,

 and then drew the surrounding heart.
 
Then I added the horizontal lines.
 
No need for perfection here! You can come back later and
 
add more lines if you decide you want more.


Wipe on the dark wax with a lint free cloth, making sure the scratches are filled.


Here is the front


and the back side
 
 
Wipe off the excess in horizontal strokes.
 
Stop when you like the color, let dry thoroughly.
 
 
NOTE: Pillar candles usually burn just in the center and not to the edge.
 
I don't plan to burn this candle but if you plan to give this as a gift
 
please give a warning to not leave a candle unattended.


The second candle is battery powered and coated with wax.
 
This candle is off-white and 6 "tall.

You can find these at the Dollar Tree.
 
The wax is just a thin layer over plastic, be careful not to
 
go too deep when you scratch your design.
 
I decided to put my design lower than the -glow- line.


Can you see?


Here it is finished !


Here are the two versions side by side.


I always feel safer using the battery powered candles.
 
 
Here is the candle next to a real Birch star that
 
the  M  in  M+L  made.


Wouldn't this make a sweet gift for a special couple on Valentine's Day,
 
or for a Wedding, Anniversary or Shower gift ?
 
 
You can also ''scratch'' the special date on the candle.
 
It's a nice personal touch.
 
xo Lisa S


Wednesday, January 23, 2019

Another IKEA Moppe Card Catalog Hack


We were out looking at Garage Sales, when I found this Mini Drawer
 
 ''Moppe'' from IKEA. They are still available from time to time but only in the store.
 
Not available online.
 
I was so excited....Mr. Freshvintage... not so much!

Here's the BEFORE-


And you thought my last  card catalog cabinet was hideous !

REALLY...A SHARPIE on raw wood........
 
What were they thinking ???
 
And Shoes???
 
The only shoes that fit in these drawers are for a BARBIE  and evidently
 
......she has a lot of shoes...... but hey that's why I got it for a dollar.
 
I don't mind because remember we are going to flip the drawers around!


A light sanding is all the prep it needs.


 Those dovetail joints are going to look great when stained.
 
Remove dust and find a clean area to stain your box and drawers,
 
inside and out -
 
My FAVORITE stain!
 
BRIWAX- dark brown 
 
 
 One step to stain and seal !
 
 After the stain is dry you can add your hardware.
 
 
I found my hardware on Amazon.....there are thousands of choices.
 
The ones that I really liked were from Rockler Hardware-
 
Card Holder Pulls in Antique Brass 1.99 each
 
Here's the AFTER !


On my desk
 
 
The little drawers are great and they keep the desk clear.
 
I am very pleased with how it turned out!
 
I hope I have inspired you today.
 
If you see one at these cabinets at the Thrift Store, Garage Sale or even at Ikea
 
pick one up and make a Card Catalog Hack of your own.


Thank you so much for visiting!
 
I appreciate every single one of you!
 
xo Lisa S


Saturday, January 19, 2019

Upcyled Tin Picnic Basket with Stencil


The Picnic Basket was such a thoughtful gift from my sweet sister and her husband.
 
Absolutely delicious ! I am sure she picked it knowing that I would just love
 
the tin basket....and I did.

She knows I save everything : )

 The size of the basket is perfect to reuse, the basket weave
 
is printed and the handles are made of wood. It is very nice quality.
 
The picture below shows the basket. I did not paint the lid. I liked the original color.


Picture and Description from Harry and David Catalog-
Still available on line


Picnic Basket Gift Tin
  • Approx. 6 Royal Riviera® Pears (2 lb 3 oz)
  • Sharp white cheddar cheese (4 oz)
  • Olive oil and sea salt water crackers (4 oz)
  • Dry salami (8 oz)
  • Spinach artichoke dip (12 oz)
  • Roasted almonds (4 oz)
  • Signature truffles [coffee, cherry, raspberry, almond, all dark, double chocolate] (4 oz)
  • Tin container, 11.5 in L x 7.75 in W x 6.7 in H
  • Net Weight: 4 lb 7 oz


  • 
    I used one of my favorite stencils from
     
    Cathe Holden's- Inspired Barn at  istencils.com


    I looked through my Acrylic paints to match the blue and taped off  the label area.
     
    I was excited and did not stop to take a picture! Sorry
     
     
    After the base color dried I taped down my stencil.
     
     I like to use painter's tape because it is less sticky and you don't want to damage your stencil.
     
     
    Remember- You can always use tape to block off or cover areas

    that you do not want to paint.
     
     
     I used a color that was similar to the basket weave tone.
     
    Use a stencil brush and off load your paint,
     
    so your brush seems dry- less is best!
     
     
    After my stencil work dried on one side I turned it around
     
    and did the other side.
     
     
    After everything was dry, I sealed the new label area with
     
    FolkArt's Home Décor WAX  in the color- Antique
     
     
    A small amount goes a long way.
     
    Just a bit on a soft rag is all you need.
     
    You can use clear wax or skip this step.
     
    I wanted to darken the color of my paint for a better match to the lid.
     
    I loved the blue color, but if you don't the lid can be painted any color.
     
    Rustoleum spray paint with primer is what I would recommend if you change the color.


    Vintage Tin Picnic Baskets are hard to find and expensive.
     
    This is my alternative look for less : )
     
    I'm not sure but I think this project is upcyled, recycled AND repurposed !!!
     
    Let me knew if you like how this turned out-
     
    Thank you so much!
     
    Xo Lisa S


    Sunday, January 13, 2019

    Vintage Valentines to Share


    Hi Friends,

    Today I just have a quick share!

    I just used mini clothes pins to hang some Valentines on an old

    bicycle rim I found in the garage!

    A fun display for a bicycling fanatic....like Mr. Freshvintage.

    Some of these are vintage, some are just copies.

    I really love the baby animals....

     I have some cute ones below to share with you.


     These can be saved and printed on card stock.


    I made these Jointed Teddy Bears back in the early '80's, from recycled
     
    Mohair and Wool Coats!


    I shared some others here and
     
    You can use these or find even more at The Graphic Fairy
     
    
    https://thegraphicsfairy.com/


    Thanks for spending some time with me-
     
    Have a great day!

    xo Lisa S


    Saturday, January 12, 2019

    Valentine Shadowbox


    I wanted to make me Husband a Valentine Book
     
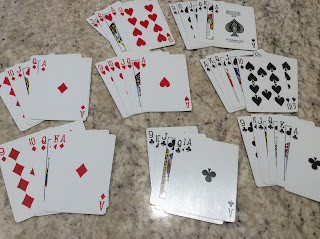
    with a deck of cards- 52 cards, filled with sweet reason why I love him so much-
     
    One page a week for the year!


    I found this deck for .20 cents- great!
     
    but I was not paying attention....see it?
     
    These are Pinochle cards....ok so what....
     
    evidently Pinochle is played with 48 cards and not all the numbers

    AND double suits ....WHAT?????....so
     
     
    oh well, I changed my plan.


    Mr. Freshvintage is an avid bike rider....so that is the significance of the
     
    Bicycle Playing Cards.
     
    I decided to make a shadow box.
     
    I removed the cards and set them aside for now. They will not go to waste,
     
    I will use them in junk journals or something.
     
    I used a utility knife to make a window. 


    Here are some Valentines


    Save and size to fit


    I loved the little Teddy with a bowtie !
     
    I printed 2 so I could make the 3D effect.
     
    One was cut and left as is. Use tacky glue to attach to the back inside of box.
     
    The other print was cut at the fence line and the arm holding flowers,
     
    and the arm holding the heart.


    I used scissors to trim my Valentine to fit the box.
     
    I found these raffle tickets at Dollar Tree in the party section.
     
    They are perforated and blank on the back side,
     
    I thought the tickets would make great mini
     
    notes or tags.
     
     
    I used a gold ink marker along the cut edge.


     Tucked a ticket tag at top.
     
     
     Added a pinch of moss and some mini silk leaves.


    I had a wood bingo piece
     
     and tied some bakers twine around the top


    I used these tiny double sided sticky foam dots
     
    to attach the 3-D arm pieces.
     
     
    I used tacky glue to add the second fence piece.


    I added a couple cards to the back side.


    Tucked them under the twine. 


    Thank you !
     
    I hope you liked this sweet Teddy Bear Valentine.
     
    Come visit again-
     
     
    xo Lisa S
    

    Faux Tin Tile Bunny

    Hello My Friends!  Most of the Craft and Dollar Stores have some chunky cut outs for Spring! There are so many ways to decorate these. I use...