Hi Everyone!
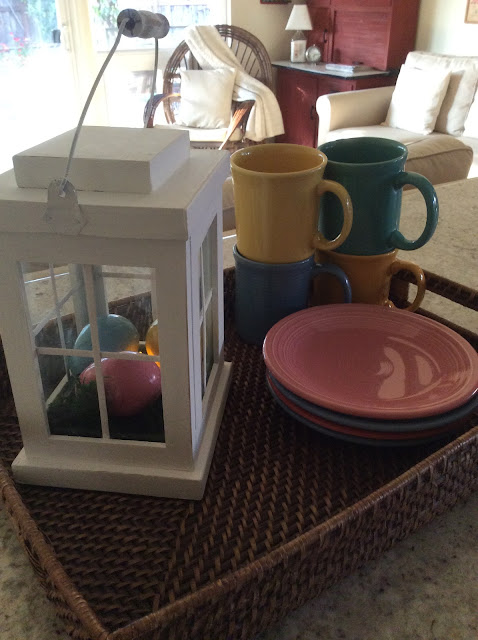
These type of lanterns have been around for a long time.
My friend Eileen gave me some frames.....
OH SO many frames....THANK YOU Eileen! I was trying to think of ways to use them-
I thought I would put together some lanterns for SPRING!
You can use any size frame.
4 same size- Wood Picture Frames with glass-
I used 5'' x 7''
8 Wood Coffee Stir Sticks- opt. for window panes
I used 5'' x 7''
8 Wood Coffee Stir Sticks- opt. for window panes
Remove the glass for now and set aside.
Remove tabs or staples that hold in the glass.
I used wood filler to fill holes. It is optional and you might not need it.
Measure across your frame mark the inside center, use scissors to cut
your window pane pieces and use wood glue to hold in place.
Let dry-
At this point I should have painted my frames !
It would be a whole lot easier so let's say we did!
Paint or stain inside and out.
Chalk Paint or Acrylic Craft paint or Spray Paint
will work just fine.
This is the glue and wood filler I used.
After your frames have dried, use E6000 to adhere the glass back to frame.
At the corners is all you need, it will need a couple hours at least
before you go on. Check to make sure the glass is set.
Remember we are pretending the picture below is painted!
Use wood glue to secure sides and clamp in place.
These clamps came from the Dollar Tree and they worked pretty good !
Sides are done !
For the top and bottom pieces you will need
2 pieces of scrap pallet wood 6 1/4 '' x 5 1/2 '' 1/2' 'or so thick
and a smaller piece 3 1/4 '' x 4 1/4 '' to sit on top, I used the other smaller pieces
1 1/4'' each glued to the underside of lid to keep it from sliding off.
Paint the base piece.
Glue the frames to the base.
I had this tin bucket and decided I would use the handle on my lantern.
I used pliers to pry off the side tab pieces and also used those.
I used small brads and nailed the pieces to the wood top.
Then painted the lid.
Here is a look at the underside of the lid.
An inside view
I hope I inspired you to make a couple lanterns.
They are easy and fun to make!
xo Lisa S


Lovely. Get idea. I will try to make one. Thanks for sharing.
ReplyDeleteThelma
DeleteThank you so much! I hope you make one, you'll love it.
xo Lisa S
Magnifico¡¡
ReplyDeleteLirtea
DeleteThank you!
XO Lisa S
the lantern came out so great! Thanks for sharing it with us at #OMGHWW.
ReplyDeleteThank you Alice!
Deletexo Lisa S
This turned out so cute! I love it with the Easter Eggs in it! Thank you for sharing at Celebrate It!
ReplyDeleteTeri
DeleteThank you! I 'm so glad you liked the lantern.
I appreciate you so much. Thanks for visiting!
xo Lisa S
super smart and interesting idea!
ReplyDeleteb
You are very kind! Thank you-
Deletexo Lisa S
So cute. I love how it turned out. Perfect for Easter Decor.
ReplyDeleteThank you Busy Lifestyle gal!
Deletexo Lisa S
Oh my gosh. This is so cute! What a creative idea! Thanks so much for sharing at Sweet Inspiration!
ReplyDeleteAmy,
DeleteI appreciate your sweet comment. I love sharing at sweet inspiration! Thank you for hosting.
xo Lisa S
It turned out so pretty! I love it!
ReplyDeleteThank you for sharing at The Really Crafty Link Party. Pinned.
Teresa-
Deleteoh you are so nice to say so!
Thank you so much.
xo Lisa S
That's a clever idea, it looks fab.
ReplyDeleteSuch a great idea! Pretty lanterns can be pricey, but simple picture frames can be very inexpensive (even for those of us who didn't receive a bunch from a friend--lucky you!). Thanks for the step-by-step instructions.
ReplyDeleteThanks so much for joining the Grace at Home party at Imparting Grace. I'm featuring you this week!
Richella
DeleteThank you so much. I really love your blog and the wisdom you share. I am enjoying getting to know you.
I appreciate you so much. xo Lisa S
So clever! I'd love to feature this. Could you add my party to your blog hop page? Thanks for linking it up at Craftastic Monday @ Sew Can Do?
ReplyDeleteThank you so much. I added you to my blog hop page and I'm happy to do so! I appreciate you hosting.
Deletexo Lisa S