Hi Friend!
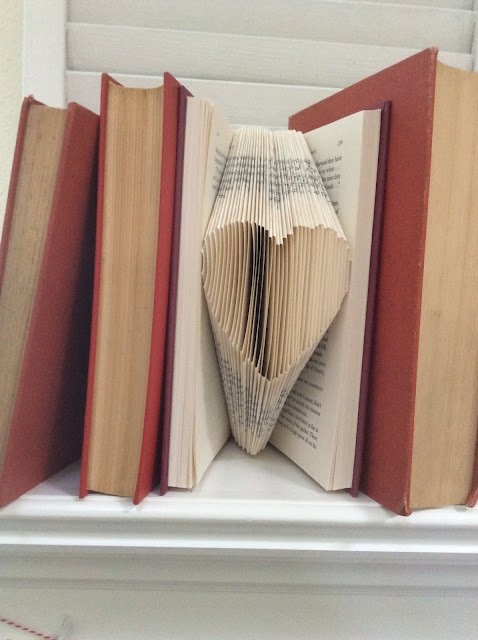
This is were ART and my arch nemesis MATH come together.....
I hope I don't loose you on this one.
Things you will need:
a hard back book over 150 pages
My book was 6'' wide x 8 1/2 '' high with a red cover
a pencil,
a ruler with centimeters markings
This pattern is measured in centimeters.
Place the book on a table like you would read it.
Open the book to the center.
This will guarantee that your design is centered in the end.
From the center of the book, count out 20 pages to the left of center and
20 pages to the right of center.
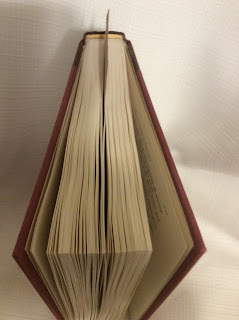
These 40 pages will be the folded design.
I clipped them just to show you.
You can remove the clips,
but hold your place.
Use a sharp pencil to mark your pages 1-40 at the top right corner.
This will not show because it will be under the fold, but it will keep you on
track if you get distracted.
Tip: The smaller number should be the top number.
Use a pencil dot to mark you measurements.
Mark all your fold lines first.
then begin to fold.
The first two marks to the pattern are on page 1, from top 7.7 centimeters
and 8.9 centimeters below.
If done correctly, you now have marked the first page and there's a gap of
1.2 centimeters between the two marks.
Now go to the next page (page 2).
Here you mark 7.1 centimeter and 9.6 centimeter
On page 3 - mark 6.8 centimeters and 10.1 centimeters.
Continue the pattern,
Page 4: 6.6 & 10.5
Page 5: 6.4 & 10.9
Page 6: 6.3 & 11.2
Page 7: 6.2 & 11.6
Page 8: 6.1 & 11.8
Page 9: 6.0 & 12.1
Page 10: 6.0 & 12.4
Page 11: 6.0 & 12.6
Page 12: 6.0 & 12.8
Page 13: 6.0 & 13.1
Page 14: 6.1 & 13.3
Page 15: 6.1 & 13.5
Page 16: 6.3 & 13.7
Page 17: 6.4 & 14.0
Page 18: 6.6 & 14.2
Page 19: 6.8 & 14.4
Page 20: 7.1 & 14.6
This is the center of the design,
We are now repeating the design in reverse.
Page 21: 7.1 & 14.6
Page 22: 6.8 & 14.4
Page 23: 6.6 & 14.2
Page 24: 6.4 & 14.0
Page 25: 6.2 & 13.7
Page 26: 6.1 & 13.5
Page 27: 6.1 & 13.3
Page 28: 6.0 & 13.1
Page 29: 6.0 & 12.8
Page 30: 6.0 & 12.6
Page 31: 6.0 & 12.4
Page 32: 6.0 & 12.1
Page 33: 6.1 & 11.8
Page 34: 6.2 & 11.6
Page 35: 6.3 & 11.2
Page 36: 6.4 & 10.9
Page 37: 6.6 & 10.5
Page 38: 6.8 & 10.1
Page 39: 7.2 & 9.6
Page 40: 7.7 & 8.9


This is so pretty! I love book folding even though I have never tried it :) We visited Longwood Gardens in PA one year for their Christmas display in the gardens and in the buildings. The library was filled with fold book page art. It was so lovely. Thanks for this tutorial. I just might give it a try! Do you mind if I link to this post in my weekly All Things Vintage round up this Saturday? I would love to share it with my readers!
ReplyDeleteCindy,
DeleteThank you! Sure I 'd be happy to share.
My library has the same display and every time I pass it I think I really want to try that. I love it! I turned it into a pocket journal.
xo Lisa S
Glad you liked my book art for the 2018 A Longwood Christmas, Cindy! (so cool to see someone comment on it randomly on the www!)
DeleteVery cool tutorial Lisa.
Thanks for sharing!
Dannielle,
DeleteIt's so nice to 'meet' you! I found you yesterday through Cindy's
comment. I see you have amazing work on etsy.
You are a Master Artist! Thanks for visiting.
xo Lisa S
Looks cool.
ReplyDeleteThanks Julie!
Deletexo Lisa S
This is a fascinating procedure -- and so precise in the measurements. I've never seen an explanation of how this is done. The result is a charming heart for Valentine's Day.
ReplyDeleteCarol
https://www.scribblingboomer.com
Carol,
DeleteIt was easier than it looked. I had my mom run through the directions for me to check and double check :)
xo Lisa S
It's wonderful. I would never have imagined it would be measured to the exact specs. Thanks for posting with Funtastic Friday Link Party
ReplyDeleteThank you, It was fun to see it come together.
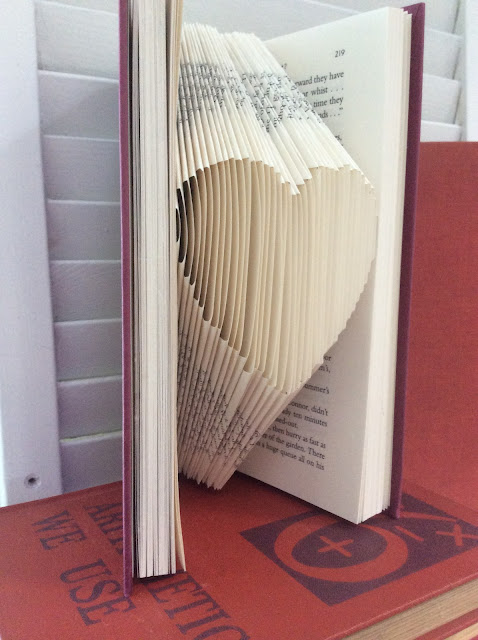
DeleteIt really has a great 3D effect.
HAPPY VALENTINES DAY
xo Lisa S
Brilliant, I've seen these done with a template, but your measurement method actually sounds easier. I think maybe starting with a simple shape is the way to go.
ReplyDeleteJulie,
DeleteThank you! I have seen templates but they look complicated.
My pattern is easy for a beginner. I would love to make a shamrock- Some designs are mind blowing-
Happy Valentine's Day
xo Lisa S
So cute! I see these, and I always want to try them. I may try with your simple shape. I don't know how people do the elaborate patterns! Thanks for figuring out the measurements for us & sharing on Crafty Creators!
ReplyDeleteXOXO,
Niki ~ Life as a LEO Wife
I'm featuring your post tomorrow on Crafty Creators. Here's the URL if you want to share your feature on social media. https://lifeasaleowife.com/2022/02/10/crafty-creators-link-party-5
DeleteXOXO,
Niki
Niki,
DeleteThank you so much!!!
You made my day. I'm so glad you plan to try my pattern. It is great for a beginner. I agree some designs are intricate works of art!
Happy Valentine's Day!
xo Lisa S
I have often wondered how these books were done. Thanks for sharing the tutorial. #HomeMattersParty
ReplyDeleteDonna,
DeleteThanks for checking it out. I hope you are inspired to give my easy pattern a try.
xo Lisa S
Lisa,
ReplyDeleteThis book heart is adorable. Congratulations, you are being featured on Thursday Favorite Things. I hope you stop by. https://www.eclecticredbarn.com/2022/02/thursday-favorite-things-party_021536055.html.
Hugs,
Bev
Bev,
DeleteYou are so sweet! Thank you!
I hope you have a wonderful weekend and Valentine's Day.
xo Lisa S