Monday, February 26, 2018

Happy Saint Patricks' Day - A gift for you !


                                                    Happy Saint Patricks' Day !

     I wanted to share these beautiful examples of Artist Ellen H. Clapsaddle (1865-1934)


                                  Ellen was an American illustrator/ commercial artist

           from New York, in the late 19th and early 20th centuries.  Her style is easily recognizable

                     and greatly admired. She is known as the most prolific souvenir/postcard

                                                      and greeting card artist of her era.


These Post Cards can be saved to your computer and used for craft projects.
 
You already know that I will print these on card stock and trim them to size. Save a used TEA BAG,
 
squeeze most of the liquid out of the bag and gently rub around the edges to AGE your card.
 
Look back to Valentines Day to see how to make wire holders for your vintage salt shakers.


What sweet little faces!


 Wire can be added to plants or standing up in shaker lids

 
Thanks for stopping by ! xo Lisa S
 

Friday, February 23, 2018

DIY SPRING PAINTED CARROT GARLAND using REPURPOSED Dollar Tree items


   The minute the weather starts to warm up I start thinking about SPRING ! Baby bunnies, vegetable gardens, baby chicks,flowers blooming and Easter will be here before you know it!

I saw these candy containers at the DOLLAR TREE and thought they could be repurposed into a cute garland for the Spring.

 Here's what you will need:

                                      
1 pkg. of 8 carrot shaped candy containers

Open the package, pop off the caps. ENJOY or dump the candy out.  Save the containers and set the containers aside for now.
(more packages if you prefer)
 You need green jute, also from the DOLLAR TREE
Scissors
ANY Dark Brown craft paint
Dark Orange paint, I used Charleston Clay


Paint in the indentations and top,using the brown paint.
Let dry

Paint with orange
Let dry

Cut 1 yd. of jute per carrot.
Loop 2 '' at a time, pinching one side.

Use your glue gun to put a little bit of glue around the inside lip of the container.


Aren't they cute?
Use the loops to hang on another piece of jute cut to the length you like.
These would like great as table scatter or place setting or hung on a wreath.
Let me know what you do with your carrots!
Thanks for stopping by,
xoxLisaS


 . 

Here is a link to by Youtube channel.

DIY Painted Carrots Farmhouse Style Table Décor using Dollar Tree Items

https://www.youtube.com/watch?v=mIKdbGTJIlA


Saturday, February 17, 2018

How to make your own FARMHOUSE sign


I really wasn't looking to make a new sign for my kitchen, but as I was looking around the

GOOD WILL STORE

  on Friday I found this great looking piece stuck in the corner.

It was my price.....$.99....but when I flipped it over, I gasped. It was not only hideous but it had an

offensive bit of so called humor.

I was embarrassed by my purchase, I ignored the stares and repeated over and over....I'm going to

paint it !

SO....There are NO before pictures !  I used white Chalk Paint to cover it immediately!

The sign was large 28'' long by 7'' wide and just the right size for the word FARMHOUSE.
                                                                         
                             I used : white chalk paint, black acrylic paint, clear wax
                                             a brush, foam or bristle

                                        3 '' stencils,  a couple sheets of paper taped together
                                                carbon paper taped to the back of lettering

                                          sand paper or sanding block
                                          
 
Laid out the stencils to see if it would fit the sign
 
 
Stenciled on to paper for final placement
 
 
                                 Taped carbon paper  or Graphite paper if you have it, to back of paper.

                               Center the word on the board. Tape in place. Draw over your stencil lines.

                                   Remove your paper and fill in with paint. After the paint has dried,

                                       you can go over the whole sign with a light sanding to give it a

                                     distressed look. You can seal with clear wax if you like.


The after was much better than the before!
Keep a look out for those wood items with great potential.
Happy Hunting at the GOOD WILL,
xoxLisaS

Monday, February 12, 2018

Happy Valentines' Day ! A gift from me to you !


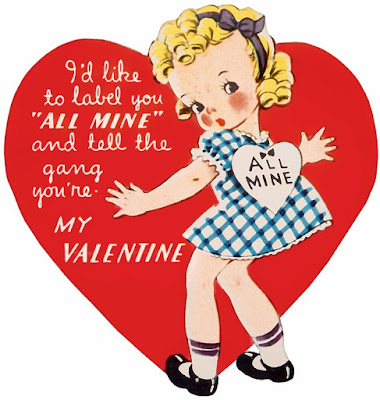
           I would like to share some retro VALENTINES with you to save on your computer.

    
                 These can be printed on card stock and trimmed to use for all types of crafts.

 In my last post I showed you how to make

                                                          photo or card holders with wire.

      https://freshvintagebylisas.blogspot.com/2018/02/how-to-make-wire-photo-or-card-holder.html

                                              These would be great to use with that project.

                                      Maybe make a banner and attach with mini clothespins.


Let me know in the comments what you make !
 
                                                                        xo Lisa S


Sunday, February 11, 2018

How to make a wire photo or card holder


              With just a piece of bailing wire
 
                              you can turn old salt and pepper shakers into a place you can display

                               your photos. What a beautiful center piece for a wedding or party.

             
                                                                  Here's what you need :

                                           Any miscellaneous shaker, with or without a mate


                                      Bailing wire- 16 or 18 gauge- approx. 12 '' per holder

                                                    Home Depot approx. $3.00 a roll


                                                        One roll will last a lifetime!


Needle nose Pliers
 
A pencil to wrap around
 
 
Cut a piece of wire about 12''
 
Use pliers to curl in at one end. This will protect you from the sharp ends.
 

                   Make a loop, about the size of a quarter-twice, this is where the photo will be held.


Wrap the straight end 2 or 3 times around a pencil. Slide the pencil out and your holder is done.


                   Use your hands to straighten and adjust where needed. Now decide how tall you
 
                                                 want your holder to be and trim with pliers.


                                                         Here are some variations. Have fun !

                                            I use mine to display some vintage Valentines.

 
In the link below I shared some vintage valentines that you can print.
 
  https://freshvintagebylisas.blogspot.com/2018/02/happy-valentines-day-gift-to-you-from-me.html


Let me know if you enjoyed making these !


Thank you,
 
xox LisaS


Thursday, February 8, 2018

Almost Homemade Peppermint Bark for Valentines' Day

 
Here is how I make Peppermint Bark with a little help from the Dollar Tree.

First you are going to need these Peppermint Bark Bars. The bars are white chocolate ONLY with the peppermint candy mixed inside, but that just won't do!  We will bump it up a notch and add more goodness. I was able to buy these after Christmas for .25 each. Their best by date is July.....the candy will be long gone by then. I bought 6 knowing they will fit nicely on a cookie sheet.

 
You will also need Parchment paper.
Chocolate for melting. You can use chocolate chips. Dollar Tree has both these items.
The chips at Dollar Tree are 6 oz. I would use 2 bags.
I was able to find dark chocolate in a 10 oz. bag. and that's my husbands' favorite. I  used 1 bag of the dark chocolate.
 
or


The parchment paper from the Dollar Tree is a great deal.
 
Cover cookie sheet with Parchment paper, open up the peppermint bark place on cookie sheet with the scored side up.
Set aside
 
Open the chocolate and put inside a microwave safe container. I used a pyrex measuring cup.
 
 
Microwave for 30 sec. and check, stir and add another 30 sec. Watch carefully so the chocolate
doesn't burn. Stir until smooth. Cover the bars evenly, and let it set.

 
          After a few minuets it will set up. You will be able to tell because it loses it's sheen.
                                                                          
 
        Now for the fun part. Break into small pieces. Place in bags to give as gifts. The bags also came from Dollar Tree. I was able to make enough for 12 Valentine's gifts.


                                                       Happy Valentines' Day ! xoxLisaS


Faux Tin Tile Bunny

Hello My Friends!  Most of the Craft and Dollar Stores have some chunky cut outs for Spring! There are so many ways to decorate these. I use...