Sunday, June 30, 2019

How to Make a Clothespin Bag

Hi Friends,

I hope your summer is off to a great start.

We are enjoying some time just hanging out at home.
 
When the weather gets warm, I like to use my clothesline.
 
 
I usually keep my clothespins in a basket, but it doesn't work very well.
 
 
I have been looking for a pattern to make a new clothespin bag,
 
 
 most of the ones I find look like tiny dresses.....so I got the idea to just

use a thrifted baby dress instead of using new fabric-
 
 
I found this tiny dress for .99 at the thrift store.


Wouldn't it be so sweet to use a special dress from your child or grandchild !


First, I removed the buttons.


Folded and pinned the front opening. 
 
The neck area needs to be big enough for your hands
 
to be able to get to the clothespins easily.


An inside look


Stitched all the way around front and neck.


Top stitched sleeves closed.
 
If you are using a wire hanger you can leave the arm holes open.


Top stitched front to bottom,  then top stitched across the base of skirt.
 
Hand stitched the two buttons.


I added one of my hangers from my collection.


About 15 years ago, I volunteered at a Women's Crisis Center that provided
 
clothing and toys to families in our area.
 
 One day they decided to change all the hangers to the tubular type.
 
 They throw these in the trash and I asked if I could have them.


I love these old hangers.
 
Most are nursery rhymes. There's Humpty Dumpty,
 
The Cow jumped over the Moon, Lambs and Piggies, and Carousel Horses.
 
My favorites are the Chickens and Baby Ducks.


I use some hangers to display doll clothes made by my Great Aunt


Here it is filled with clothespins.


It will work just fine!
 
 
For some reason I just love laundry related items...I don't have a laundry room,
 
 
I have a little area in the garage where I have my collection.


My vintage retractable clothesline works great and it's used everyday !


Thank you for visiting me today!
 
I hope you have a wonderful week.
 
Come back anytime!
 
xo Lisa S


Saturday, June 22, 2019

Make your own Starfish / Sea Star

Do you add a little Coastal Flair to your Summer Decor?

I made these Starfish for just pennies!


Remember back in school when we made Topographic  Maps
 
 
from flour and salt clay? If not here is the recipe.


Flour and Salt Clay
 
1 cup flour
1/2 cup salt
1/2 cup cold water

Add the salt to the water and stir to dissolve.

Then add the flour, this will make the clay feel less gritty.


Mix with your hands-
 
yes, I know you want to!
 
 
Smooth like a pie crust. If your kitchen is hot and your clay is sticky
 
just add a small amount of flour....too dry add more water.
 
 
This is the amount of clay I had to work with.
 
 
Store in an airtight container or bag until you are ready
 
to make your Starfish.
 

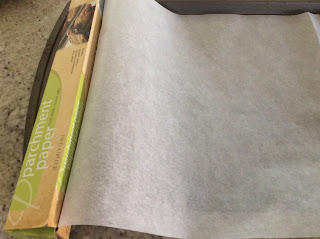
You will need a cookie sheet and parchment paper.
 

I drew a pattern of my starfish.


Then put the pattern under the parchment paper.


Then rolled out the clay to match the pattern.

Rounded sides look more real than flat sides.
 
I moved the pattern around and continued.


I used a pencil to poke holes in the starfish, this gave it texture.


( You can poke a hole all the way through if you want to hang your starfish !)


PIN FOR LATER- Maybe for a Beach themed Christmas tree or
Wedding !


Fill up your cookie sheet with starfish.
 
Bake at  250 degrees 25 min.
 
cool to touch, flip and 25 min. on the other side.

You can let these air dry....but I am too impatient  : )


I was able to make 9 starfish.
 
 
Now they are ready to paint.


I used a matte white Acrylic paint


I painted front and back. If you use a dry brush, the holes will not
 
fill with paint. They look more realistic this way.


Just placed a couple in a wreath


Tied three together in a bundle with jute.


Placed on a shelf


Along side some books-


Here is a gift tag you can tie on your starfish!
 
It is a vintage souvenir postcard from the Graphic Fairy.
 
You may save and print.


 A gift to a friend!


 Thank you so much for visiting!
 
These are so easy and fun to make- if you have any questions I would be happy to help.
 
Just ask in the comments or email me.
 
Have a great week!
 
xo Lisa S


Warning: Not to scare you but be cautious.
 
 PLEASE keep away from small children and dogs that may eat these.
 
This amount of salt can be toxic to animals.


Friday, June 14, 2019

Easy 4th of July Wreath

Hi Friends !
 
I hope you are doing well.
 
 I am enjoying a break from our early heat wave !
 
I was working on this easy wreath.


This is the base that I used,  It was a Christmas wreath.
 
The diameter is 9''. 
 
My dollar store had SO MANY after Mardi Gras was over, they marked them down to FREE !
 
 
Yes, please and thank you very much!


I just cut off the tinsel.....and this is the wreath frame.
 
I used scissors to cut off the top hanging loop.


I used this velvet type bow, but you can use other ribbon or fabric
 
with stars and stripes.
 
The bow was easy to take apart. It was held together with a twist tie.


To make the number 4,  I used 3 of these thin wood
 
plant sticks.


I started with the star material, I wrapped about 1/4 of the wreath.
 
 
Then used hot glue to hold in place.


Then wrapped the stripes


When I finished the wreath it looked like this-


Lay your wood pieces out. Mark where you need to cut.
 
This thin wood can be cut with scissors.


Use wood glue or white glue to hold your '4' together.


 I use white acrylic paint, and a black paint pen to write July.


I used hot glue to attach to wreath.


This small wreath can sit on a shelf.

I put mine on the mantle.

What do you think ?

Let me know if you like this wreath and plan to make it !

xo Lisa S


Tuesday, June 11, 2019

Stenciled Galvanized Flower Bucket


Hi Friends!
 
I have another quick stencil project to share with you.
 
 
My Mom gave me this old galvanized flower bucket,
 
 
she knew I would want to stencil it :)


This is the stencil I wanted to use.
 
Round surfaces can be tricky.


6" X 6"
 
 
I was able to tape the stencil to bucket
 
with no problems.


I used black acrylic paint and a stencil brush.


I cut some flowers from my garden.


When I brought them inside I remembered......I really don't like
 
the way Daisies smell !


So ....outside they went, to the front porch!
 
 
They look nice there so that's where they will stay!
 
Thanks so much-
xo Lisa S


Faux Tin Tile Bunny

Hello My Friends!  Most of the Craft and Dollar Stores have some chunky cut outs for Spring! There are so many ways to decorate these. I use...