Friday, December 31, 2021

Top 10 MOST VIEWED 2021


Hello friends,

Happy New Year!

At the end of the year,

 I  like to look back at some of the projects I shared here.

We can do a little countdown of the most viewed.

I'll just list them here with a link back.

It always surprises me ; )


#10


#9

Playing Card Journal/ Notebook


#8

WINTER MANTLE

Memorizing Scripture


#7


#6

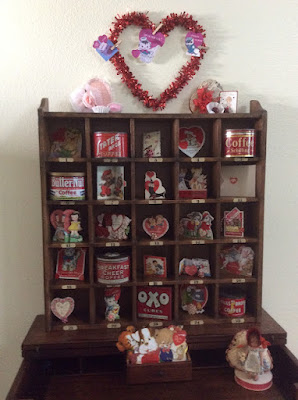
Valentine Vignette


#5

Trash to Treasure Iron Plant Stand


#4

Easy Junk Journal


#3

Junk Journal Cookbook


#2

File Folder with Junk Journal


The project with the most views this year was this upcycled table!

#1


That was fun! 

I like to look back over projects from the past year.

I look forward to seeing your Top 10 !

If you post a list,

Please leave a comment below,

and add the link :) 


Happy New Year!

xo Lisa S


Monday, December 20, 2021

A Simple Christmas Card


Hi Friends,

Well I was  just about done with gifts and I realized

I  needed a few more Christmas cards for neighbor gifts.

I had some blank cards on hand-

They were never used because they had a glossy finish.

I plan to use acrylic paint for my design.


I just went into my paints to see what I had-

Green for the wreath and garland, grey for wood-like background,

white for snow,

 and other colors for the ornaments.

I also used a fine point ink marker and gold pen.

The stiff toothbrush is used to splatter white paint 'snow'.


I used gray with a dry brush for the back ground of the card

and the left edge on envelope.


With green, I made a wreath shape.


On the envelope edge I painted a garland.


Use the back of a round paint brush to form the dot ornaments.


Add more colors.


After the dots dry we can add more details with a pen.


Snow' can be added at the end using white paint on a paintbrush.

Add paint to tips of toothbrush and flick paint onto project

using your thumbnail.


'Snow' can be added at the end using white paint on a paintbrush.

Add paint to tips of toothbrush and flick paint onto project

using your thumbnail.


Use a permanent ink fine point marker to write a sentiment.


Now I have enough to put aside  for later.


MERRY

CHRISTMAS

and

 HAPPY NEW YEAR ! 

xo Lisa S


Monday, December 13, 2021

Another Little Golden Book Junk Journal for Christmas

PLUS - An Easy way to make POCKET PAGES


Hi Friends!

Since my Golden Book Junk Journals continue to be

a popular post, I have another book with a tip to share.


This book was in very bad shape.

The cover was already torn apart.

I show you how to take apart the book here in more detail.


Cut your cover and book pages to 8' by 6''


Today I  want to show you an easy way to make

pockets for your Little Golden Book.


To start,

you will need a 12''x 12'' sheet of

cardstock or scrapbook paper.

I prefer double sided.

Fold in half.


Unfold, this is the back of the inside.


Fold again, I have a tiny score board so I 

fold in half to score the paper at 4''

and fold up.


Use a bone folder or plastic credit card edge

to burnish or smooth the folds.


Glue the outside 1/4'' of pocket and down the center.

Let dry a few seconds.


I have a heavy duty 3 hole punch.

It can be adjusted for the 8'' book.


I put a piece of tape on the punch so

I know were to line up the page.


Punch the folded edge.


Each pocket folder has 4 sides to decorate

and fill. Paper can also be add to the center

area for more variety.

These pockets can be used in sewn journals

 if you do not punch the holes.


I made a stack of these.

All the pages are 8'' high 6'' wide with

a 4'' pocket.


I put one pocket between each book page.

I try to keep the story pages in order.

Sometimes I have to fix a page or remove it

if it's too damaged.


I lay out the pages and continue until the end

of the book.


I use 3 binder clips to hold the pages together.


Now is the fun part!


Adding to the pockets.


A few extra pages here and there-


On the clips I add some ribbon.


It's a nice chunky journal.

A unique gift for a friend.


Ready to be filled with Christmas memories.


Merry Christmas!

Xo, Lisa S


Holiday Boutique Best Seller Hostess Gift

Hello my friend!  Today I want to share with you some of the projects I started working on for the Holiday season. For me, my first craft sh...