Thursday, March 11, 2021

Thrifty Find- Vintage German Paper Mache Easter Eggs

Hi My Friends!

I have been on the lookout for a 

Vintage Paper Mache egg for years....

I really only wanted one, but they were

nowhere to be found...for my budget..

until now.

Today I found 4 large eggs at my favorite

Thrift Shop.

Two of the eggs had something

 inside but they were taped closed- 

I made by purchase and went to my car.

I couldn't wait to give the eggs a better look.

The two that were taped closed had two more nested inside!

That was an unexpected surprise.

Yes, alone in the car I let out a squeal and did a little happy dance.


The pictures remind me of old storybooks!
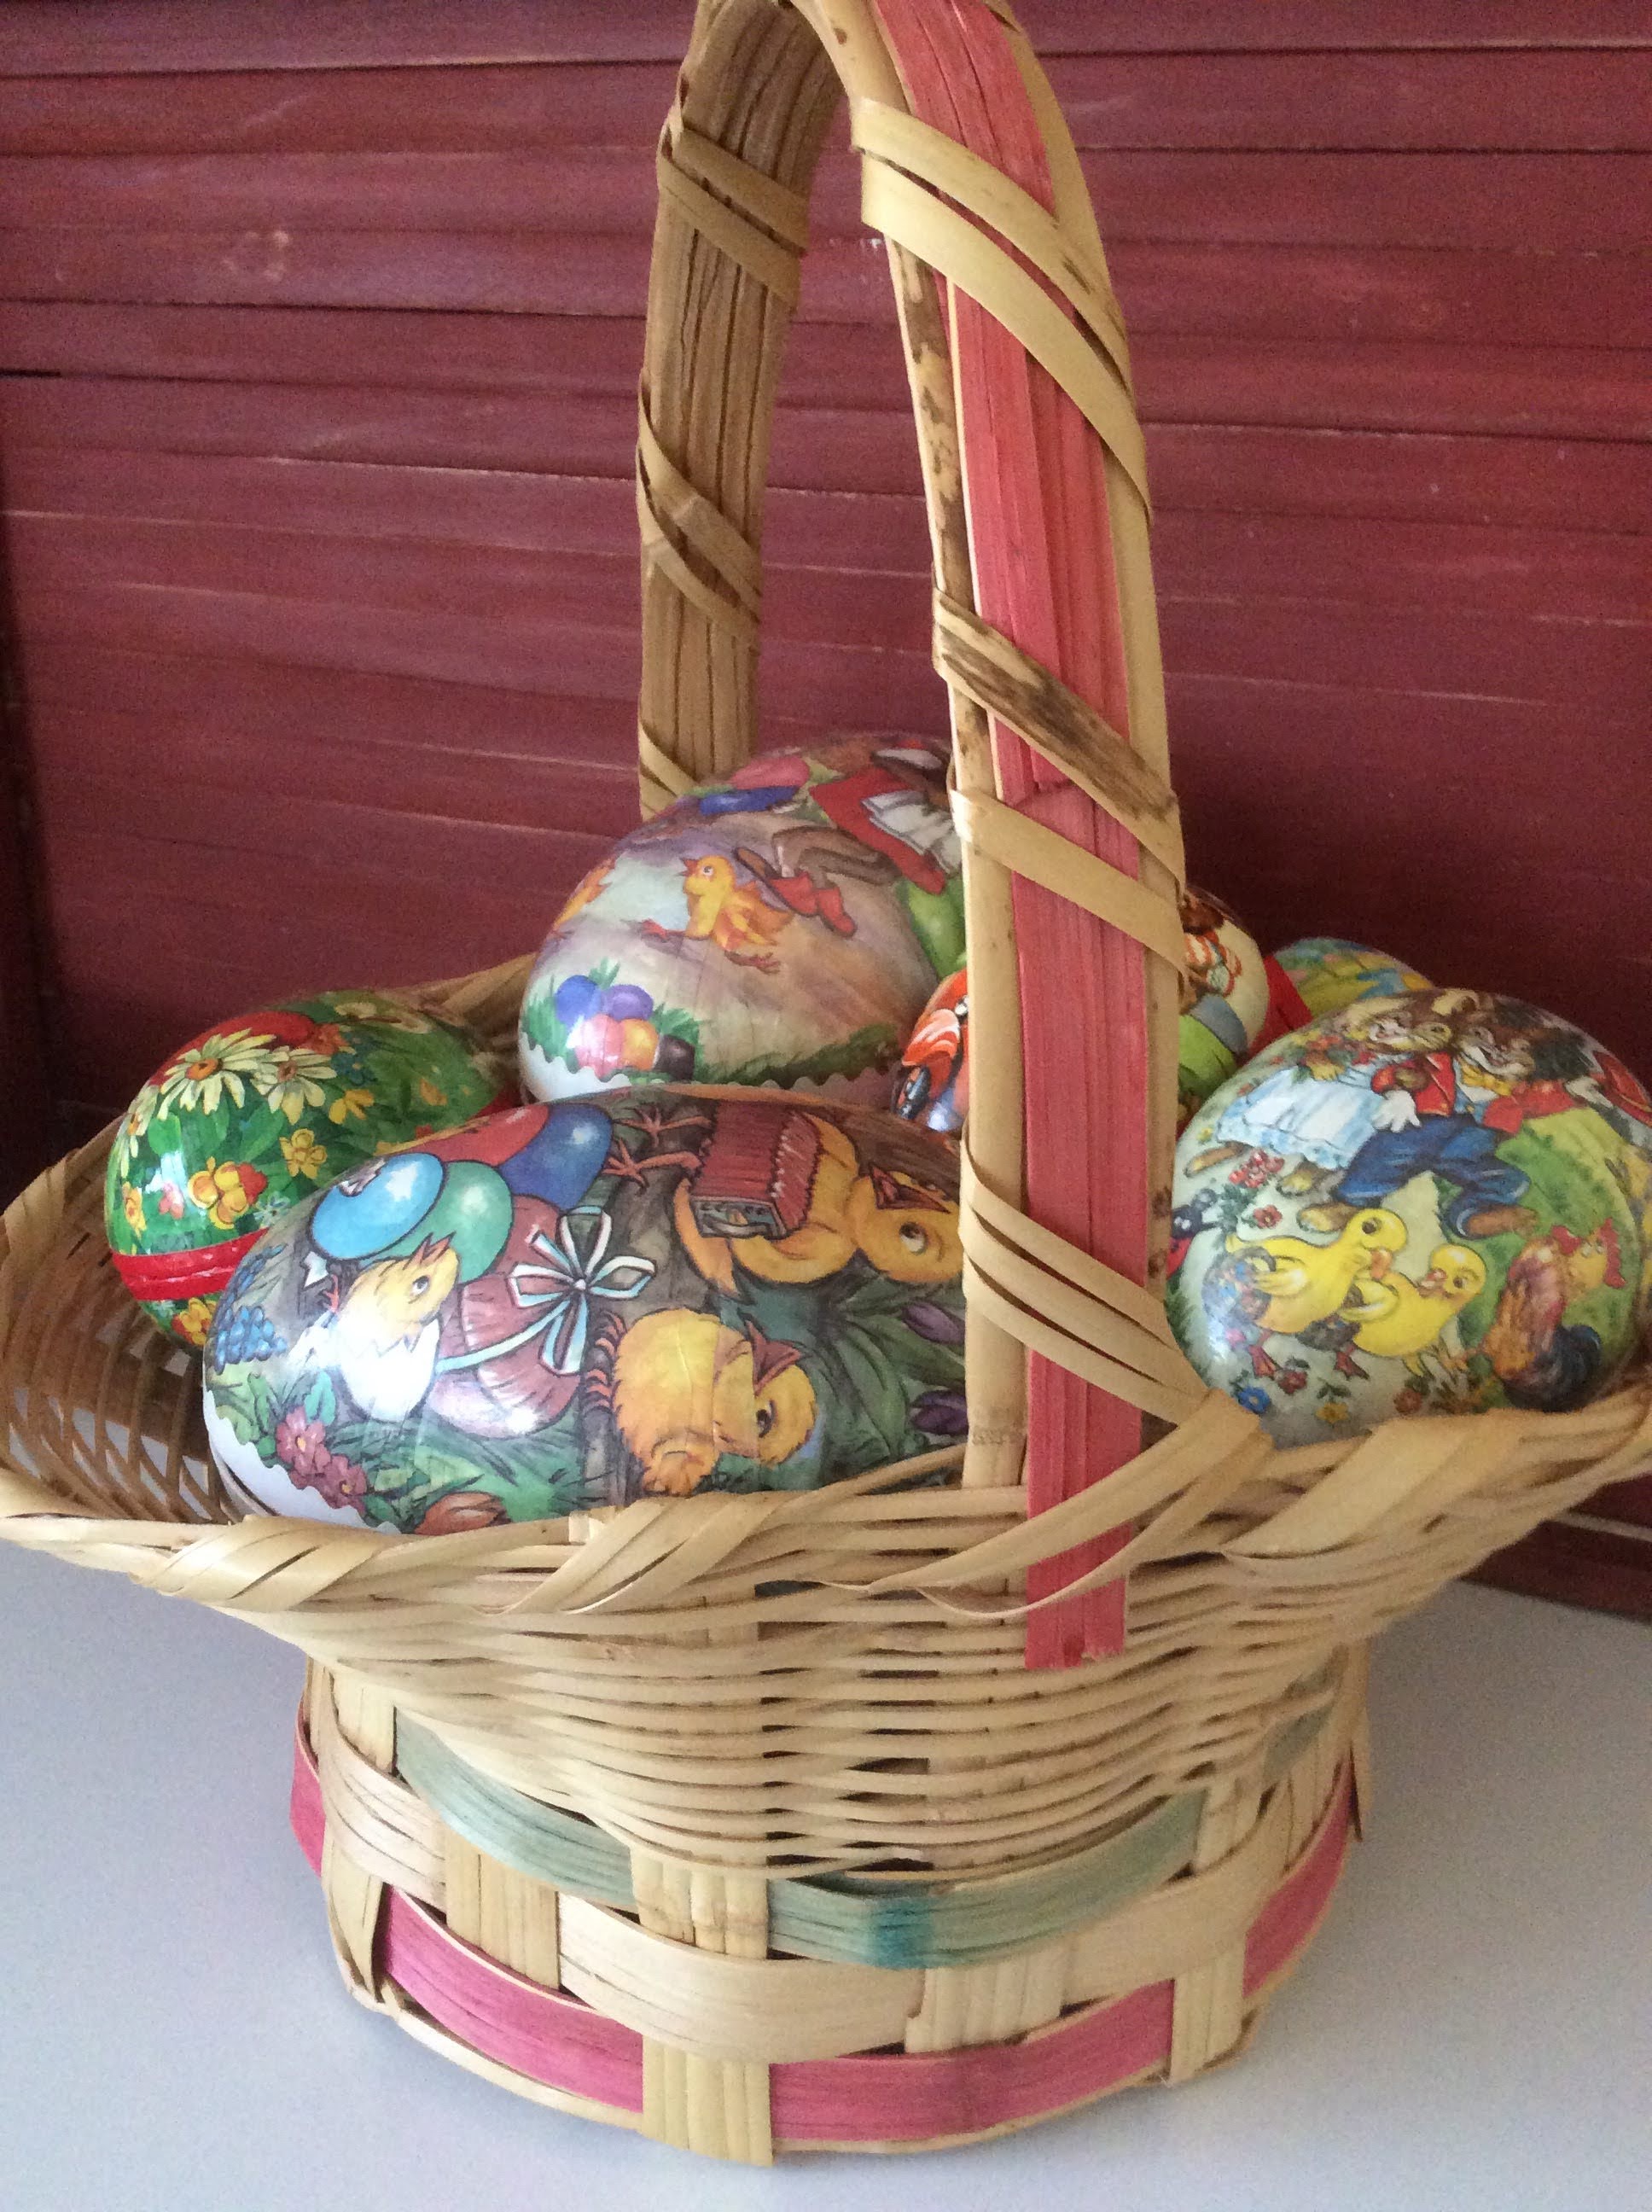


Two chicks singing away!


This bunny is getting into the chocolate eggs- yum!


Bunny in the Daisies


This couple is dress up in their best outfit!


This duck looks mischievous. Not sure what he's up to, but he is

bringing an umbrella just in case.


Riding a scooter making a delivery!


My favorite, I think.

Two chicks in a sailboat,

being watched by a snail on shore.


How to Date Paper Mache Eggs from Germany

Look inside the egg-

Eggs stamped German were produced before 1918

Eggs stamped German Republic are dated from 1918 through 1933

Those eggs stamped East Germany, German Democratic Republic,

West Germany or Federal Republic of Germany were made

after World War ll 


SEE'S Candy Corp. still has some Eggs available at Eastertime.

https://www.sees.com/easter-candy/easter-treasure-egg/757.html?cgid=easter-candy

Even the newer eggs seem to be highly desirable by collectors.


Do you remember these?

What's your favorite candy that you hoped

would be in your basket at Easter?

XO Lisa S :)


I love black jelly beans and 

Robin Eggs ( Malted Balls )


Sunday, March 7, 2021

Upcycled Table/Plant Stand with Chinese Checker Board

 Hi Friends,

I have been a collector of checker boards

 for many years.

Originally I loved them because they were tin,

 then I found more that were made

of wood and much older.

The game was invented in Germany in 1892 with the name 'Halma'.

This version was popularized in 1928 by the Pressman Co. and the name

was changed to Chinese Checkers.

The game itself has nothing at all to do with China.

It was a marketing strategy by the toy companies.

I just fell in love with the bright colors and the the graphic design.

They remind me of quilt patterns.

I have them hanging as art in our family room.


The back side is checkers.


My family loves the game because you can have 2 to 6 players.

When the kids were young we played a lot!

It's a simple game, 

with the objective being get to the other side

of the board by jumping

 your marbles over your opponents marbles.


Being at home so much this last year,

we found ourselves eating in different rooms

just to break up the monotony of eating at the kitchen table. 

I wanted to have a little table to set drinks-


I found a plant stand at the thrift shop

and thought it would make a good  small table.

My version of and old T.V. tray!

I used this game board.

The board is in 2 pieces, with 2 drawers.


I took it apart.


I used this plant stand base.


Marked where I needed to drill the holes.


I flipped it over and screwed the base to the legs.

Put the top on and

put the drawers back in.


After I put it together, I decided to paint the legs blacks.....

so I took it apart spray painted the legs then put it back

together again.

I was happy how it turned out.

It's very sturdy.


It's small and easy to move around

the room.


We can even take it outside to use

during summer BBQ's.


I appreciate the visit!

Thank you-

xo Lisa S


Monday, March 1, 2021

Sharing More St. Patrick's Day Postcards

Hi Friends,

March is here already!

My Husband and I were out this past weekend and found

two new postcards from Artist Ellen Clapsaddle.

You know they are my favorite and I would love to share them with you.


I didn't find much green around my house  :) but I did find

some green baking twine.


I added some spools of thread-I thought why not, they're green.


I hung it across my green window.

One little spot for St. Patrick's Day.


Have a great week!

Would you like more postcards for St Patrick's Day?

 HERE  and some more  HERE 

xo Lisa S


Tuesday, February 23, 2021

Easy Vintage Book Junk Journal

Hi Friends,

A long time ago....I saved this book from the trash at a Thrift Shop.

The cover was completely torn off and the pages were damaged.

I found it in my stash and decided to see what I could do with it.

I loved the cover and the illustrations, they were good enough to use again.


I used my paper cutter to remove the torn spine.

I have some paper tape that I got at Dollar tree. It works great!


Once the spine was set, I needed to fix the inside.


Glue and more tape fixed the interior.

I covered the spine with cloth I had on hand.

It matched the shawl of the girl in the window.

I used Mod Podge to add the cloth.


I covered the inside with some blue cardstock.

From the outer edge, over the tape and to the edge of spine.

Measuring from the center to the edge, I started to but together

 folded stacked of 10 papers.

I plan to make 3 stacks called 'signatures' to sew into my book.


I used pages from the dictionary, sheet music, coffee stained paper,

illustrations from other books.

I folded the pages in half and cut to fit.

Sometimes I tear to size, I like the raw edges.


These are my 3 signatures ready to be sewn in the book.

I use clips to hold the pages in place.

I love the vibrant colors of these birds posters.


You will be sewing inside the center fold line.


I made a removable paper template to mark the holes in the spine

then into your folded paper.

I used an awl on a block of wood.


I use a tapestry needle a piece of embroidery thread.

The thread is measured to 3 times the height of the book.


Start center, go through the pages

 and the spine to the outside of the book,

 leaving a tail to tie a knot later-


Then go to outside hole and sew

 through to the inside, then all the way across

and repeat. You will be back to the center hole.

Tighten and tie a knot.


Tie your knot over the center cross thread.


One signature is sewn in, now add another. 


The spine will show your stitches.

If you don't like the look you can cover with another piece of cloth 

or add beads :)


Here's a quick look at the inside-


The last illustration and page says "Good Night"


It was fun to give this pretty book a new life.

I was able to put together a nice amount of scrap paper.

It cost nothing but my time :)

Thanks for being here today-

xo Lisa S


Mexican Pizza

Hello my friend !  I'd love to share with you a family favorite- Yes, it's a copy cat recipe from Taco Bell.... but so much better a...