The weather is warming up and I can't wait to get out in the garden!
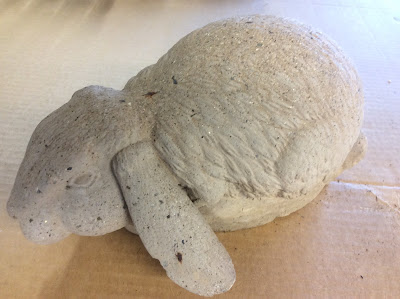
My husband bought this Bunny for me over 30 years ago.
It has been in our garden ever since!
He is made of concrete tinted in a terra cotta color.
Recently I noticed one of his ears has worn away.
Recently I noticed one of his ears has worn away.
His color has faded and kind of just faded into the background!
I wanted to give him a little makeover for Spring!
I just love the grey concrete/ cement Bunnies ......
Let's see if we can update his look with paint.
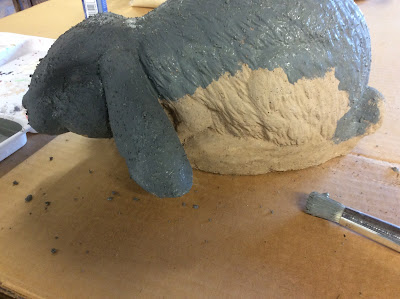
I used Acrylic Paint in Cobblestone- I added about 1 teaspoon of sand to my paint.
Over the years my Bunny was worn down smooth.
The sand sticks to the paint and it worked great!
He is starting to look better already.
I let him dry overnight.
Then went over him with a white wash until I liked the color.
1 part paint to approx.4 parts water
Let him dry again.
I used a spray Matte Sealer to protect the paint
because I planned on putting him back in the garden.
I think he has a cute face!
Back in the Garden!
I love it!
I found these small resin bunnies at the 99 Cent Store.
They had great detail so I painted and white washed without the sand added to the paint.
I had extra paint so I painted a few pots-
and a few more....
Here's a few of my other backyard statues-
My neighbor was throwing them out and asked if I wanted them.
YES! YES! YES!
I put them out in the garden.
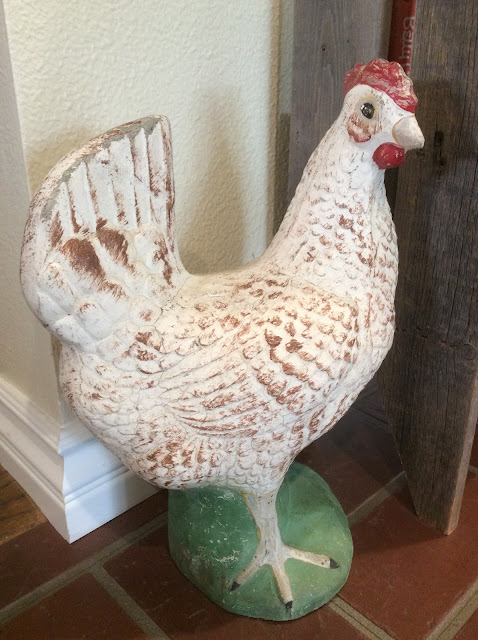
These are vintage and I love the way they look- even with a cracked beak!
The ducks get to stare at the real chickens in the Run.
This guy is a favorite resting place for lizards. They lay on his back and sun themselves!
This chicken has house privileges.
She sits in our kitchen.
Thanks for letting me share a bit of my garden with you !
xo Lisa S


Wow! Its amazing how just a little bit of paint transformed this adorable garden bunny! Love all the concrete friends in your garden.
ReplyDeleteAudra
DeleteThank you so much! He does look better now. I am hoping the paint might keep him from falling apart.
xo Lisa S
love your freshened bunny. You did a great job. Enjoyed looking at your other items throughout your garden too. How nice of your neighbor to share them!
ReplyDeleteJan
DeleteThank you so much. I do have nice neighbors...one in particular gives me great stuff. He also gave me a cement bench and bird bath. I will show later in the garden tour :) xo Lisa S
oh - PS - I had two cement geese, one large, one small in my yard. My grandson 'attacked' them and broke their tough little necks. I tried gluing them back together... worked for a while, but finally had to let them go. I miss them!!
ReplyDeleteJan
Deleteoh no- mine is glued together with E6000 and she has no legs....I'll keep her til she crumbles. Maybe you will be able to find a replacement, I hope so. My Mom and Dad have a huge set of deer,when I was little I tried to sit on them. Thanks for visiting! xo Lisa S
Love the bunny make over. What a great idea!
ReplyDeleteThanks Debbie in Georgia!
DeleteI really appreciate your sweet comment-
xo Lisa S
This is super cute and a great upcycle. Thanks for sharing.
ReplyDeleteThank you, Thank you!
DeleteI look so forward to your parties, I appreciate you hosting. xo Lisa S
You have inspired me to paint some pots. Found you on Blogger's Pit Stop Link Party
ReplyDeleteCandy
DeleteOh good! I 'm glad I inspired you. Paint changes everything. Thanks for stopping by and saying hello!
xo Lisa S
I can't wait to try this. I have a sheep that needs a little TLC. He's a little too shiny for my taste, so I think I will try this on him. Thank you for sharing!
ReplyDeleteCherryl
DeleteAwe a sheep would be darling with some fresh paint. I agree with you, I prefer less shiny.
Thanks for your sweet comment.
xo Lisa S
Great upcycle, Lisa! Thanks for sharing at Vintage Charm!
ReplyDeleteThank you so much-
Deletexo Lisa S
What a smart way to refresh an outdoor piece. Thanks for sharing.
ReplyDeleteI came over from Classy Flamingos
Rachelle
Rachelle
DeleteThank you for your kind comment! I'm glad you found me please visit again. xo Lisa S
Wow! The bunny looks great! The addition of sand to the paint gives it great texture, and the whitewashing is perfect. I love the way your pots turned out as well.
ReplyDeleteThanks for sharing at Sweet Inspiration!
Amy
DeleteYour comment made my day! You ARE a sweet inspiration!
Thank you-xo Lisa S
You did a wonderful job! I would love to have a bunny like that - we have a real live one, but she's useless as Easter decor because she chews everything :)
ReplyDeleteThank you for sharing at The Really Crafty Link Party, and happy Easter.
Pinned.
Teresa
DeleteI loved your story! Thank you for your sweet comment.
I added your party link to my Blog Hop page.
Happy Easter! xo Lisa S
Oh, that cement look is GREAT! You did a lovely job! (wonder how those ducks would look with the same effect?)
ReplyDeleteThanks Julie! I need to do some major repair on those ducks. They are barely put together with glue:)
Deletexo Lisa S
So adorable!! Man, now I want to go find a bunny!! :)
ReplyDeleteThank you so much! I hope you find one :)
Deletexo Lisa S
Lisa,
ReplyDeleteLove the bunny makeover and the pots!! I actually have a bunny that could use a freshening up!! LOVE the chicken!!
Happy Easter!!
Hugs,
Debbie
Hi Debbie
DeleteThank you so much! I hope you had a wonderful Easter.
xo Lisa S
Hey Lisa, would you ever consider creating a silicone mold of your lop eared bunny statue and casting new concrete replicas for sale? I am having the darndest time finding a concrete bunny that appeals to me. And your bunny is perfection. I honestly think it would be worth it.
ReplyDeleteI'm not sure how to make a silicone mold. I will investigate !
Deletexo Lisa S