Wednesday, October 30, 2024

Smashed Buttons-

 Hello my friend!

I save any button that comes my way...

so I would have to say I collect buttons.

The other day I noticed I had a very large amount of 

metal shank buttons saved from a past jewelry project.

They were used to make button charm bracelets.

Most of the metal buttons I have are made of brass.

I wondered what else I could do with them 

and this was what I came up with-


I brought the buttons out to our workbench-


I took one at a time, wrapped in cloth

to the vise and started to tighten each button flat!


If you don't have  a vise you could use a mallet or a hammer.


The buttons look like small coins, tokens and medallions.


I wanted to use them as embellishments on my

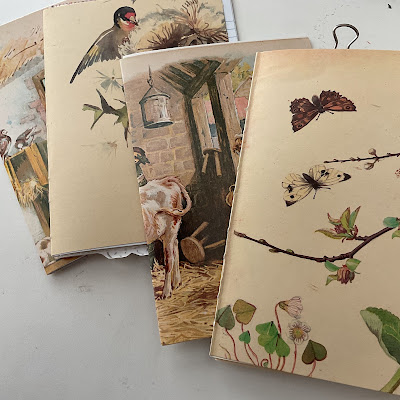
small journal covers.


They are thin and remind me of an old fashion

wax seal.


This journal flips up to open.


Maybe you will be inspired to make some smashed buttons

for your own jewelry or artwork.

Tell me what you think-

xo Lisa S


Tuesday, October 22, 2024

Twin Journals from Vintage Linen Towel

 Hello my friend!

I had this vintage hand towel with beautiful embroidery

but when it was hanging the design was covered up.

I decided to cut it in half and use it for something else-

I cut in half again to have a piece for front and back.

Then flipped one side around to have

lace edging on both sides.


I used my sewing machine to stitch around

the edges.


The two journals are similar, but a little different.


I used my sewing machine to stitch around

the edges.


Make your hole with a punch.


I use a Crocodile tool-


Add grommet/eyelet and crimp closed.


I bought these pony-tail holders at the Dollar Tree.


Loop the pony-tail holder through the eyelet.


Sew a button by hand on opposite side of cover.

I had two of these large vintage shank buttons.


They are a pretty pearlized blue.


Both books have the same signature pages.

I used my sewing machine

 to attach the signatures to the cover.


Good advice-

Be your beautiful self !


Here are the finished twin sisters!

I will be bringing

them to my Holiday Boutique next week.

I plan to sell them together.

So someone can give one as a gift

 and keep the other for themselves.


Thank you for stopping by today !

It's always nice to have you visit.

xo Lisa S

Tuesday, October 15, 2024

Upcycle Flannel Shirt with Favorite Old T-shirt


Hello, my friend !

Have you ever had an old T-shirt 

that you really loved but it was pretty tattered ?

Maybe it had stains or lost it's shape
or
maybe a child has out grown a shirt

but still loves the graphic design.


I used an out grown T-shirt-


                                                                          and a flannel shirt-


Together to make a new shirt !

I cut out the T-shirt design.

Trimmed it down to size to fit

 the back of the flannel shirt.


I used a scrap of fusible (iron on)

interfacing between the shirts.

Cut interfacing an inch or so small than

the T-shirt if you want a ragged edge later.

Interfacing is used to stabilize the thin knit shirt.


I centered the design on the back of the flannel shirt

and ironed in place.


I used my sewing machine to stitch around the design.


Then I used sharp scissors to cut 1/4'' apart fringe.

Be careful not to cut the stitching or the flannel shirt.


Put it in the wash and then the dryer-


Love the look-

Now I can still wear an old favorite.


In our family, usually the old favorites would become

hand-me-downs OR pajamas.

I thought I would try something different.


Today is a perfect Fall Morning

 to wear my new shirt !

Have a beautiful week!!!!

xo Lisa S


If you enjoy upcycling Flannels,
you might like these-

here and here and another here


Tuesday, October 1, 2024

Autumn Junk Journal with Stenciled Cover


Hi there!
I was in the mood to make an Autumn or Fall themed Journal.

I used an old book for the cover. 

I gathered  together papers that had warm colors of gold

and browns.


The cover was golden yellow.


I reenforced the spine with some card stock.

Then destressed the edges with ink.


I used this stencil for the cover.


I used brown acrylic paint and then used gold paint to 

highlight some of the stenciled words.


After the stencil was dry, I used clear wax as a sealer.

This left a smooth finish.

You could also use Mod Podge as another option.


I liked the gold details.


I had 4 signatures to sew in the cover.


I used gold embroidery floss to sew in the signatures.

This multi colored pack came from the Dollar Tree.


Marked my holes for stitching


The signatures are sewn in one at a time.


Here is my finished spine with signature stitches showing-

I don't mind seeing them-


I added some antique lace on the edges, pecking out.


I cut leaves from old book pages.

These are leftovers from a wreath project.

If you need a pattern, here is one for you.


I used some coffee and water color on the leaves.


I added some loose leaves to the journal

here and there.


Some feather shapes too-


Finished up with a piece of antique lace.


Thanks for checking out my Autumn Journal.

Have a wonderful week!
xo Lisa S


Vintage Book Hidden File Holder

Hello friend ! I was doing a bit of cleaning- I came across this old Dictionary, I use the pages  for all sorts of crafty things. It's g...